Setup a Digital Ocean server using Meteor Up
This page documents the process of setting up a cloud-based server for RadGrad using Digital Ocean and Meteor Up.
Buy a custom domain name for your RadGrad server
Use a domain registrar service such as NameCheap to buy a domain name for your RadGrad server. This is necessary in order to enable HTTPS for secure communication with your RadGrad server.
Use Digital Ocean DNS for your domain name
You need to tell your registrar that you will use Digital Ocean's name servers. For instructions, see How to point to Digital Ocean Nameservers from Common Doman Registrars.
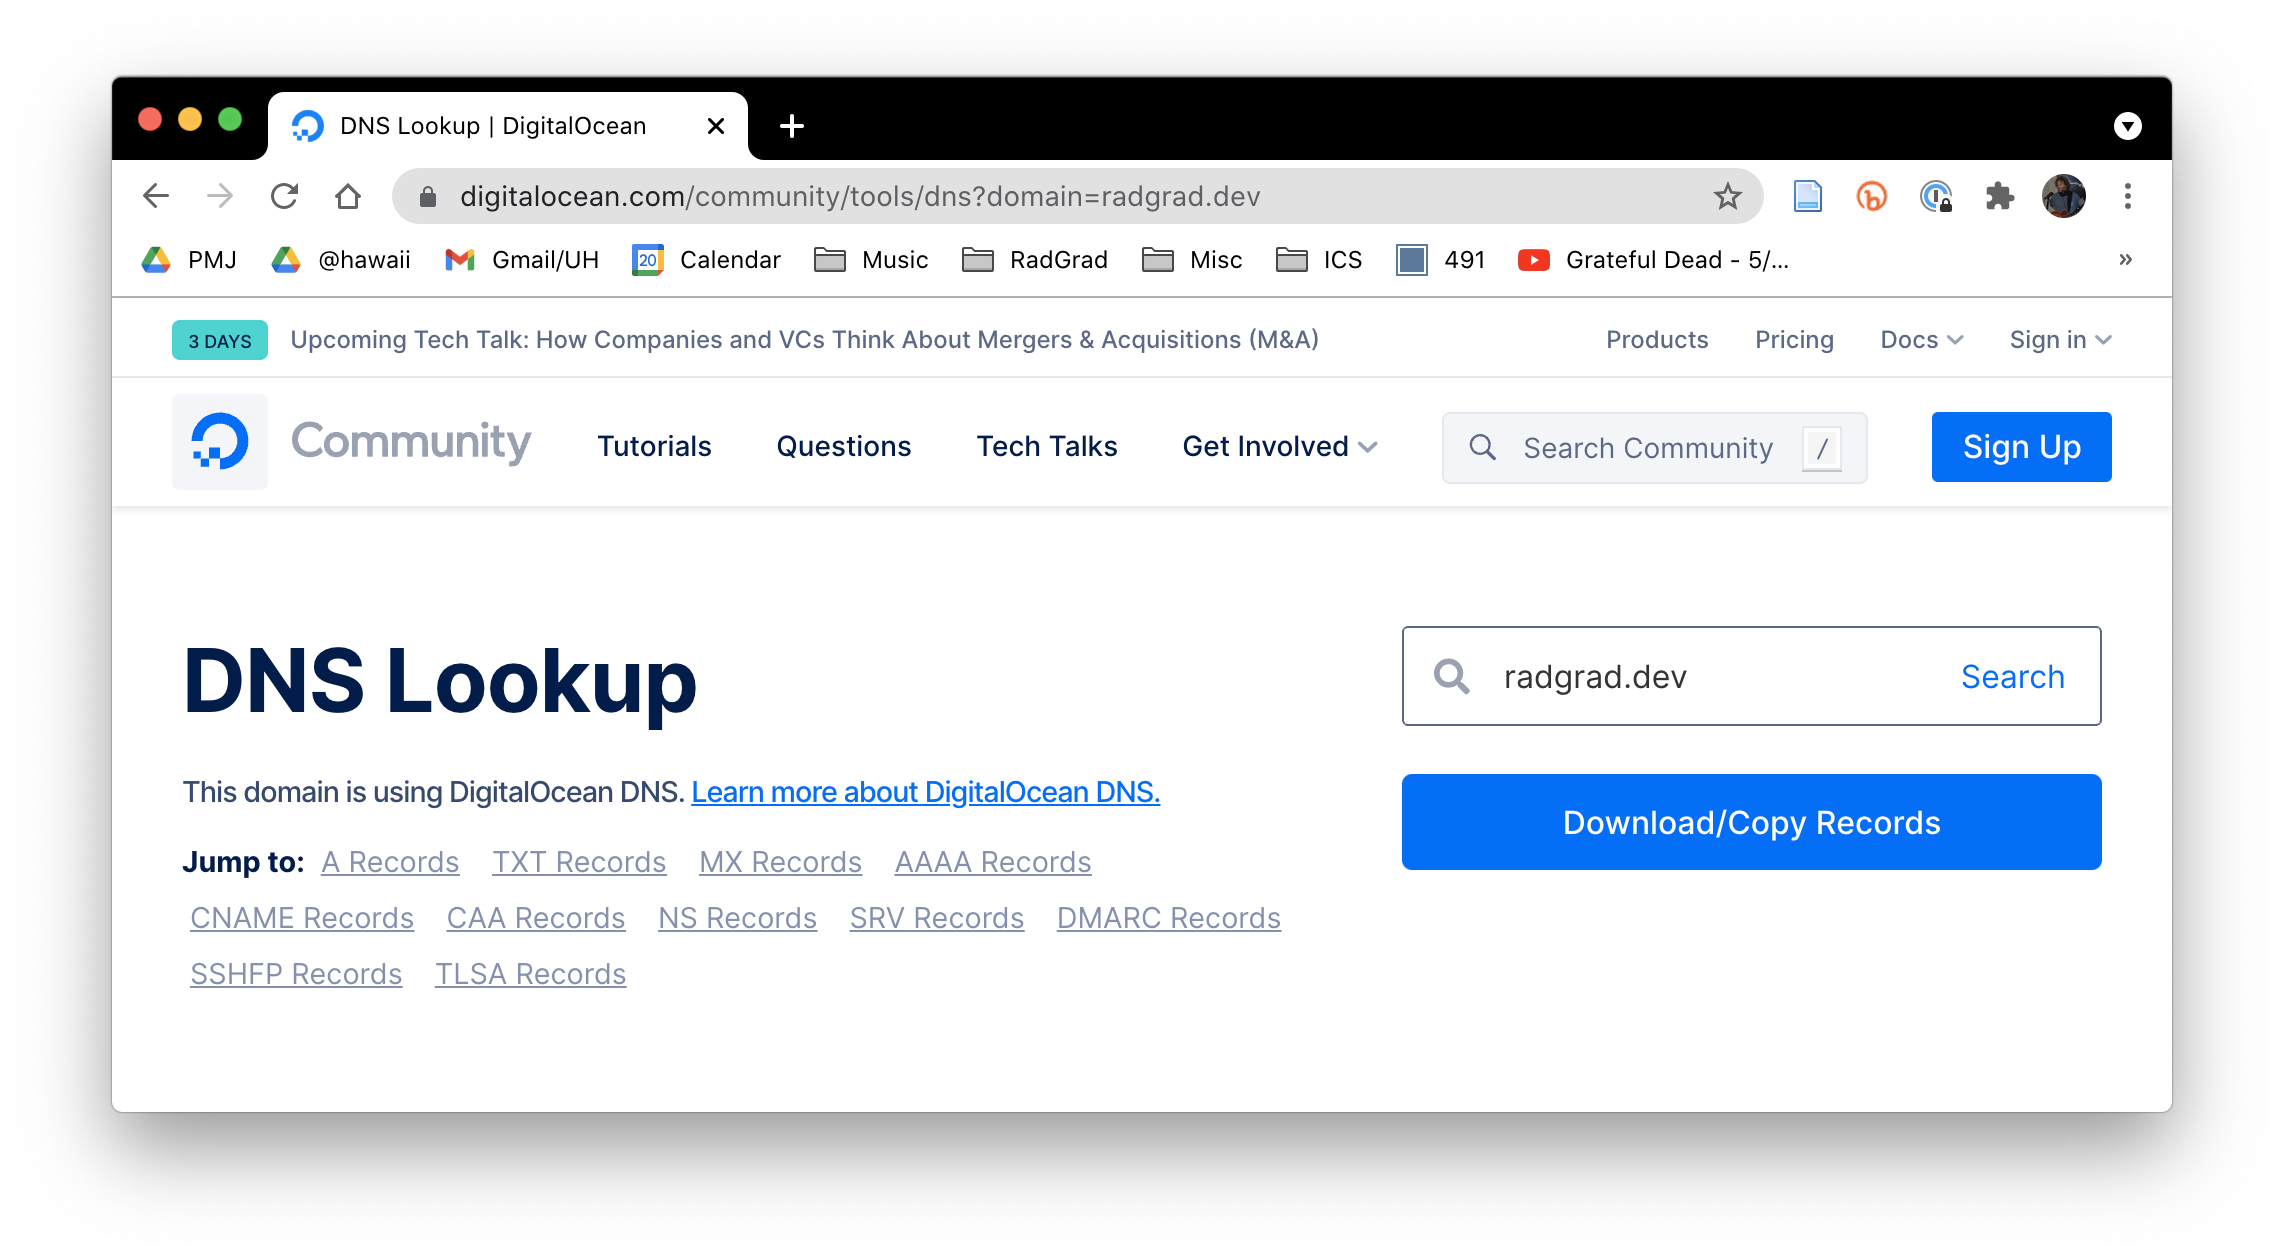
Propogating this change takes up to 24 hours, so be patient. To check to see if it's finished, you can use Digital Ocean's DNS Lookup Page.
For example, for the (newly created) radgrad.dev domain, once the transition is complete, this page displays the following:
Create an Digital Ocean Ubuntu server (i.e. Droplet)
Login to Digital Ocean, then click on the "Create" button and select a Droplet (Ubuntu server). Create a root password and save it someplace safe.
It's helpful to change the default name of your droplet to the intended custom domain name to simplify management. For example, here's the newly created droplet for "radgrad.dev":

Connect your domain to your droplet
In Digital Ocean, go to your Networking tab on the left menu, then click "Domains". You should see a pane like the following:
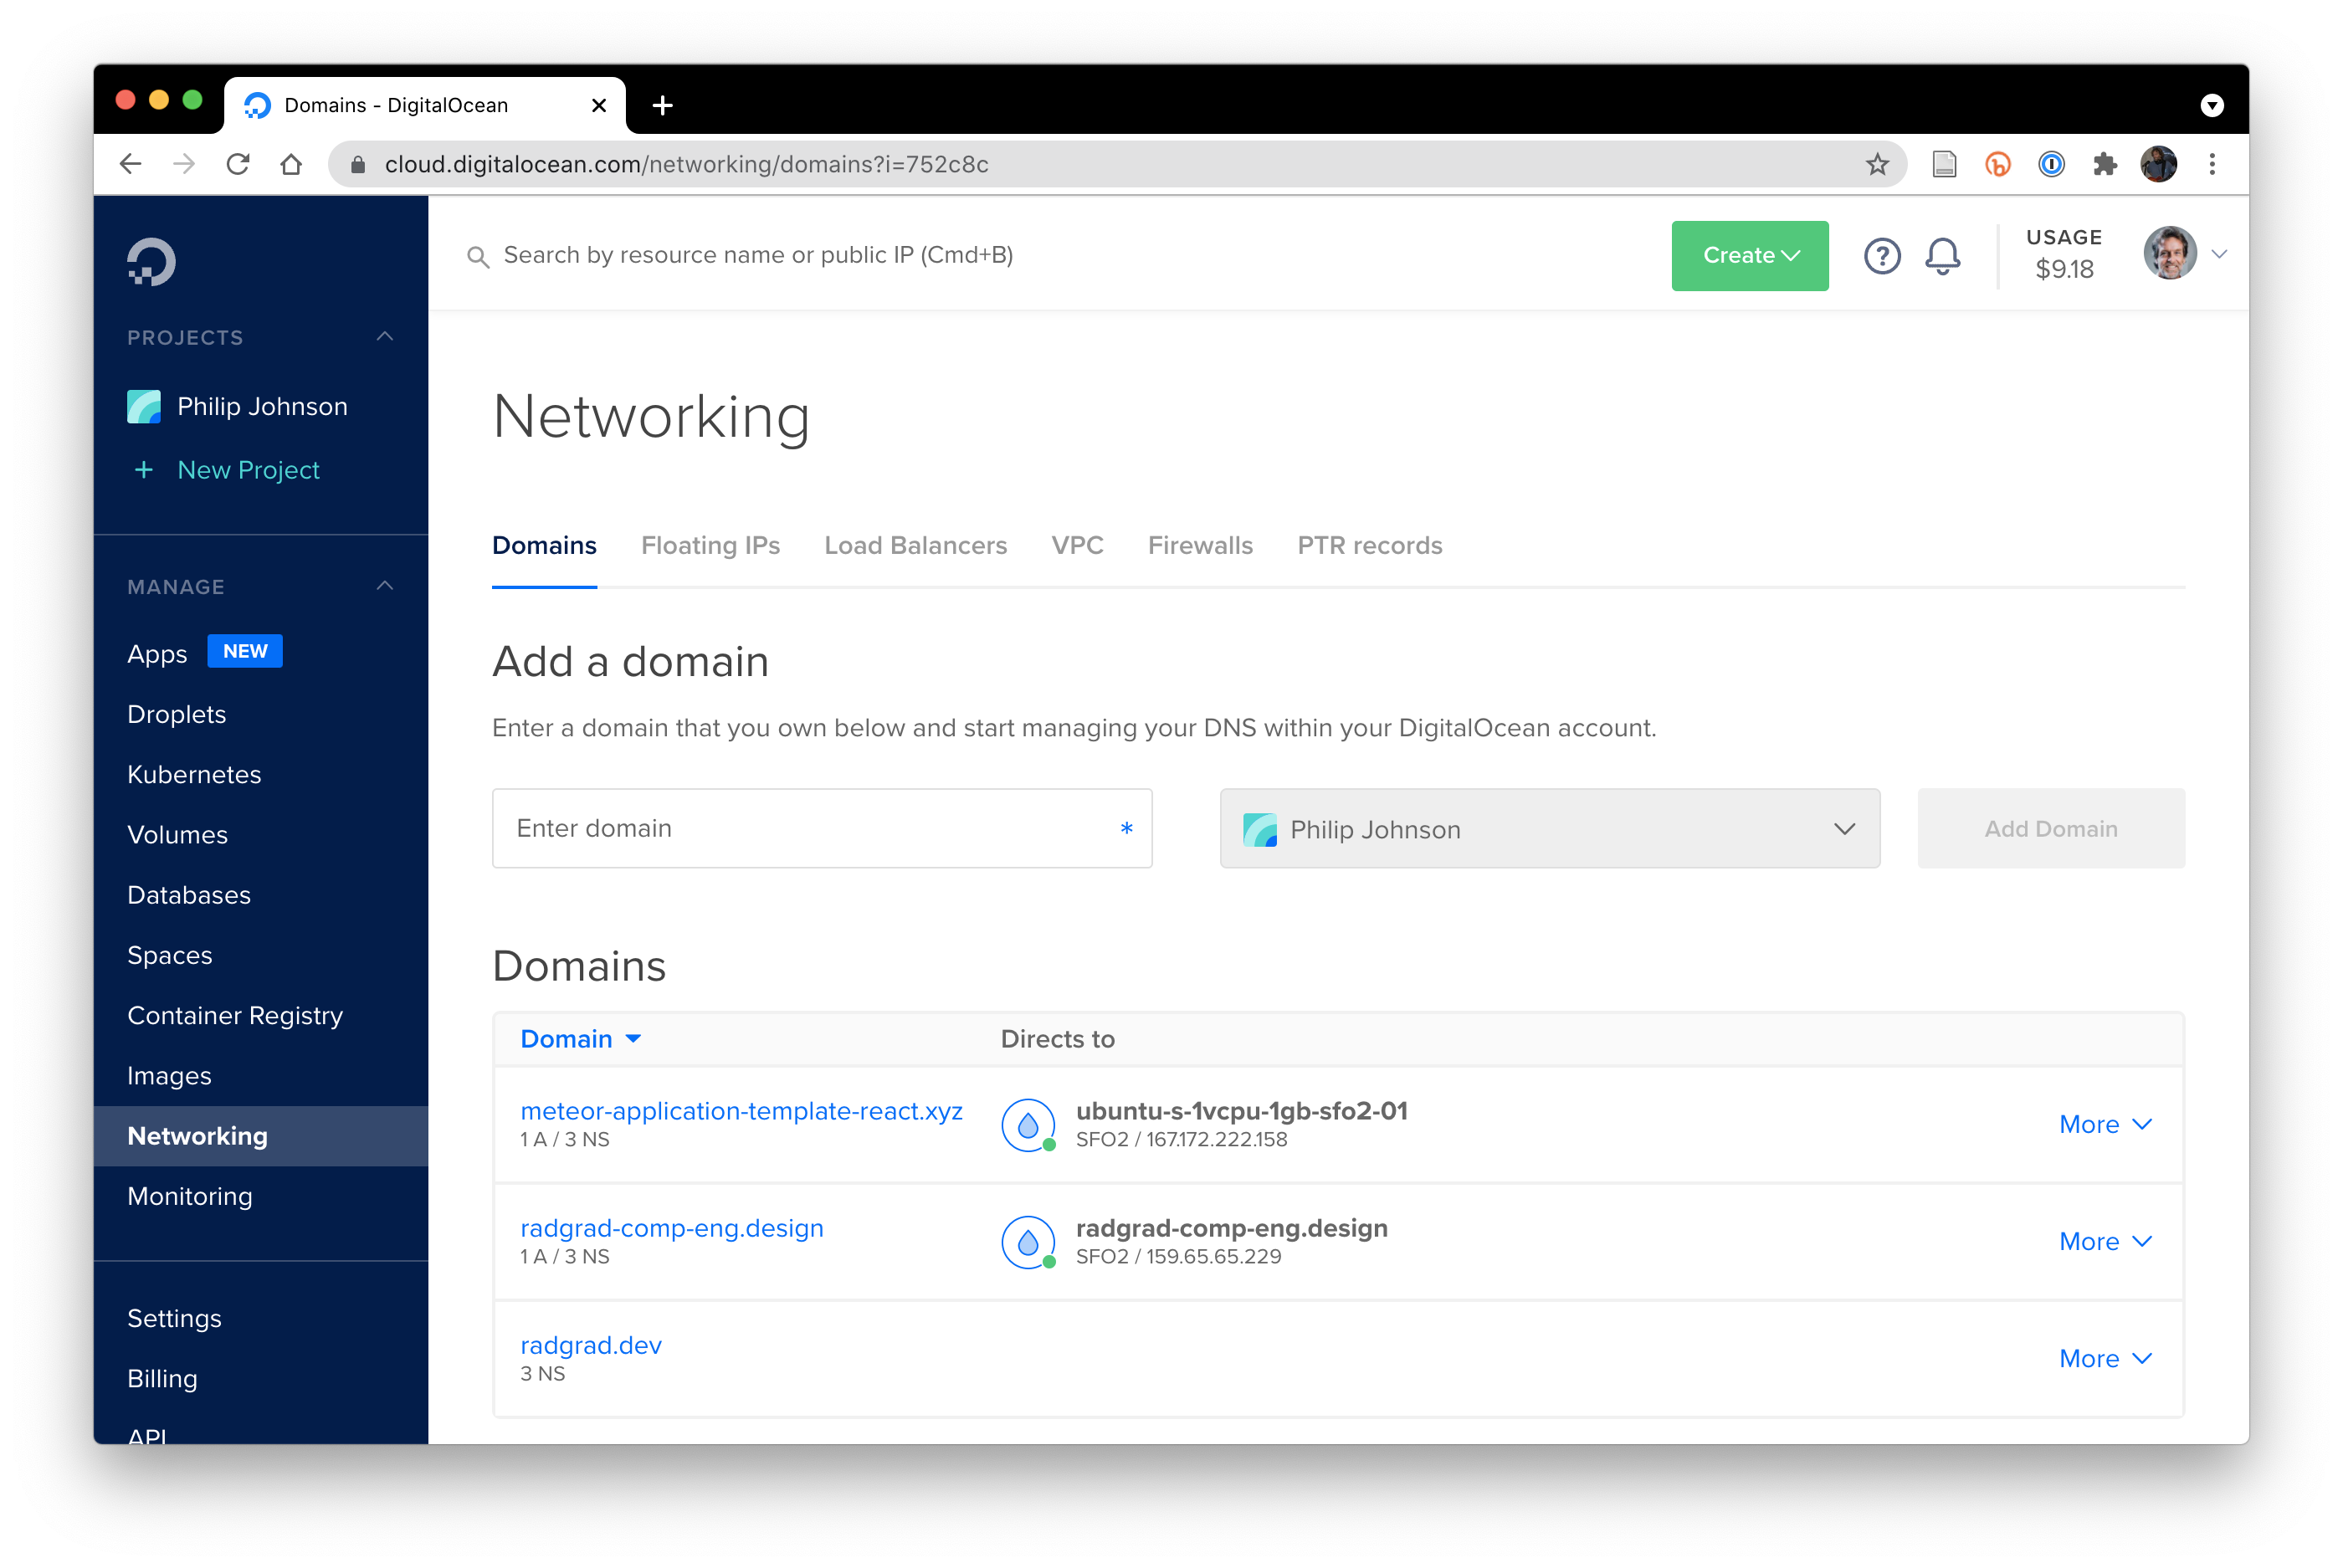
You can enter your new domain, then click "Add domain". Once the nameserver transfer has finished, you'll see "3 NS" below the domain name.
Next, click on the domain, put "@" for the hostname, and select your droplet:
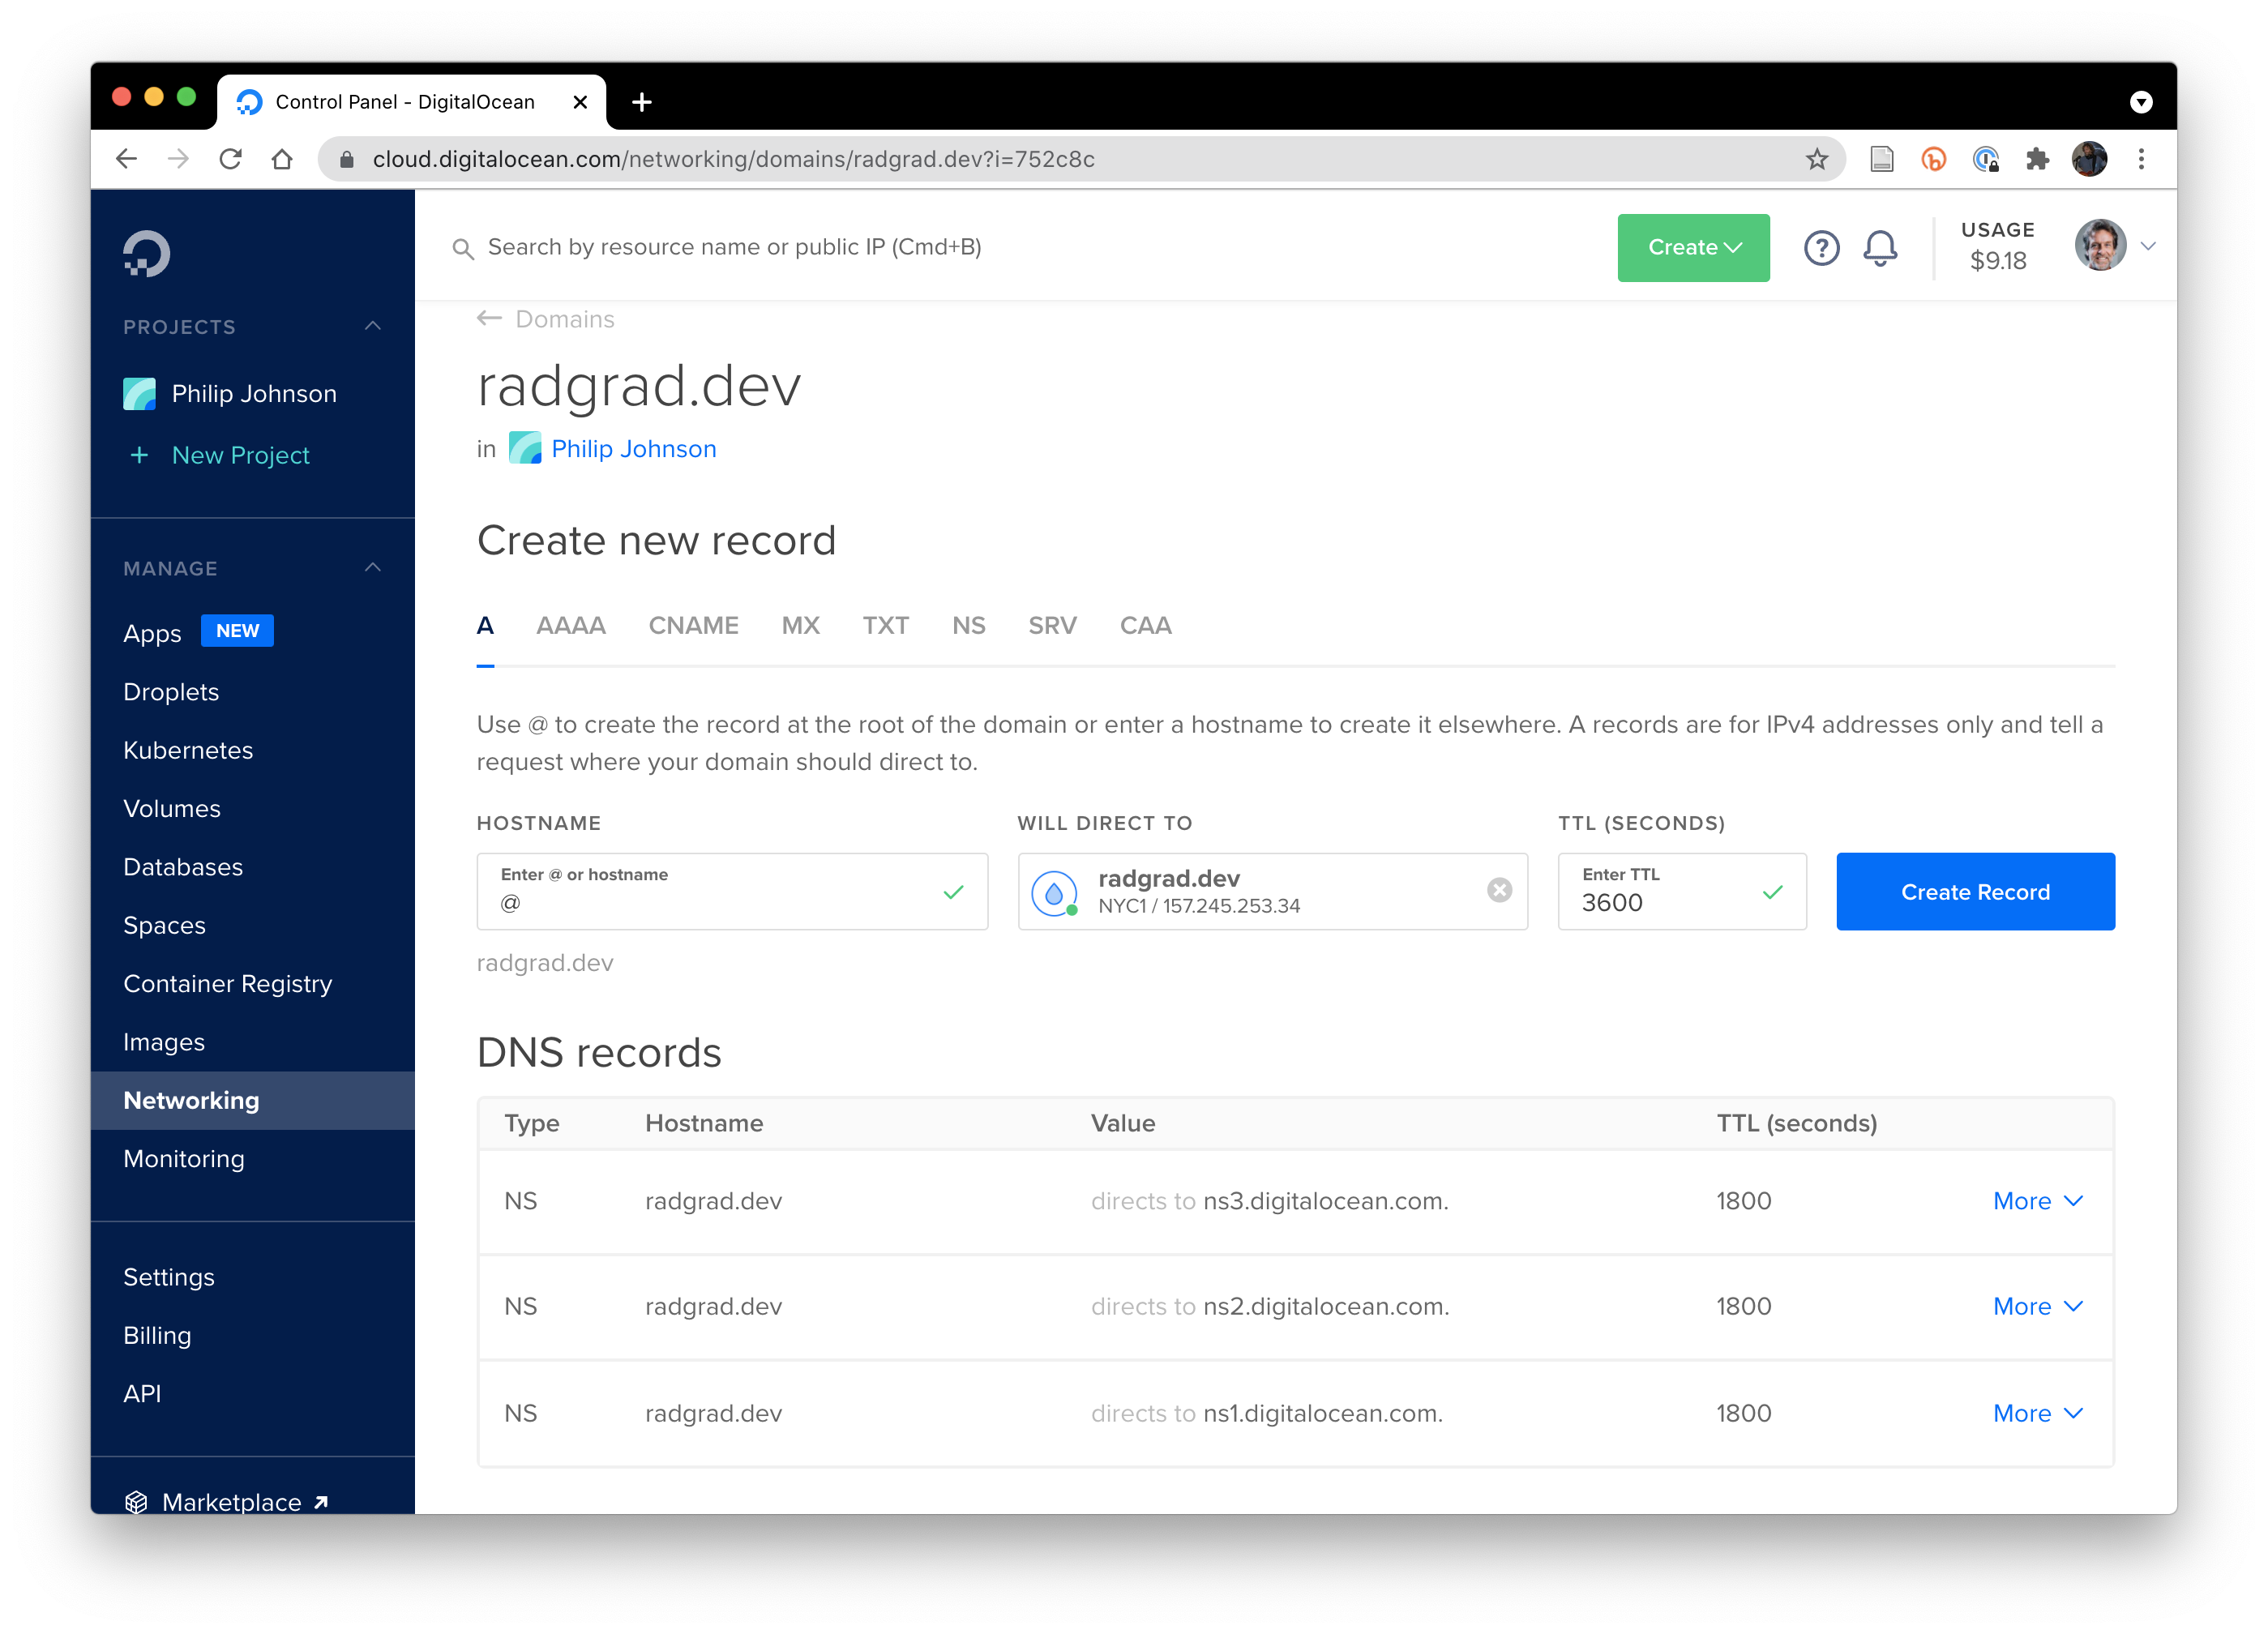
After clicking Add Domain, it will look like this:
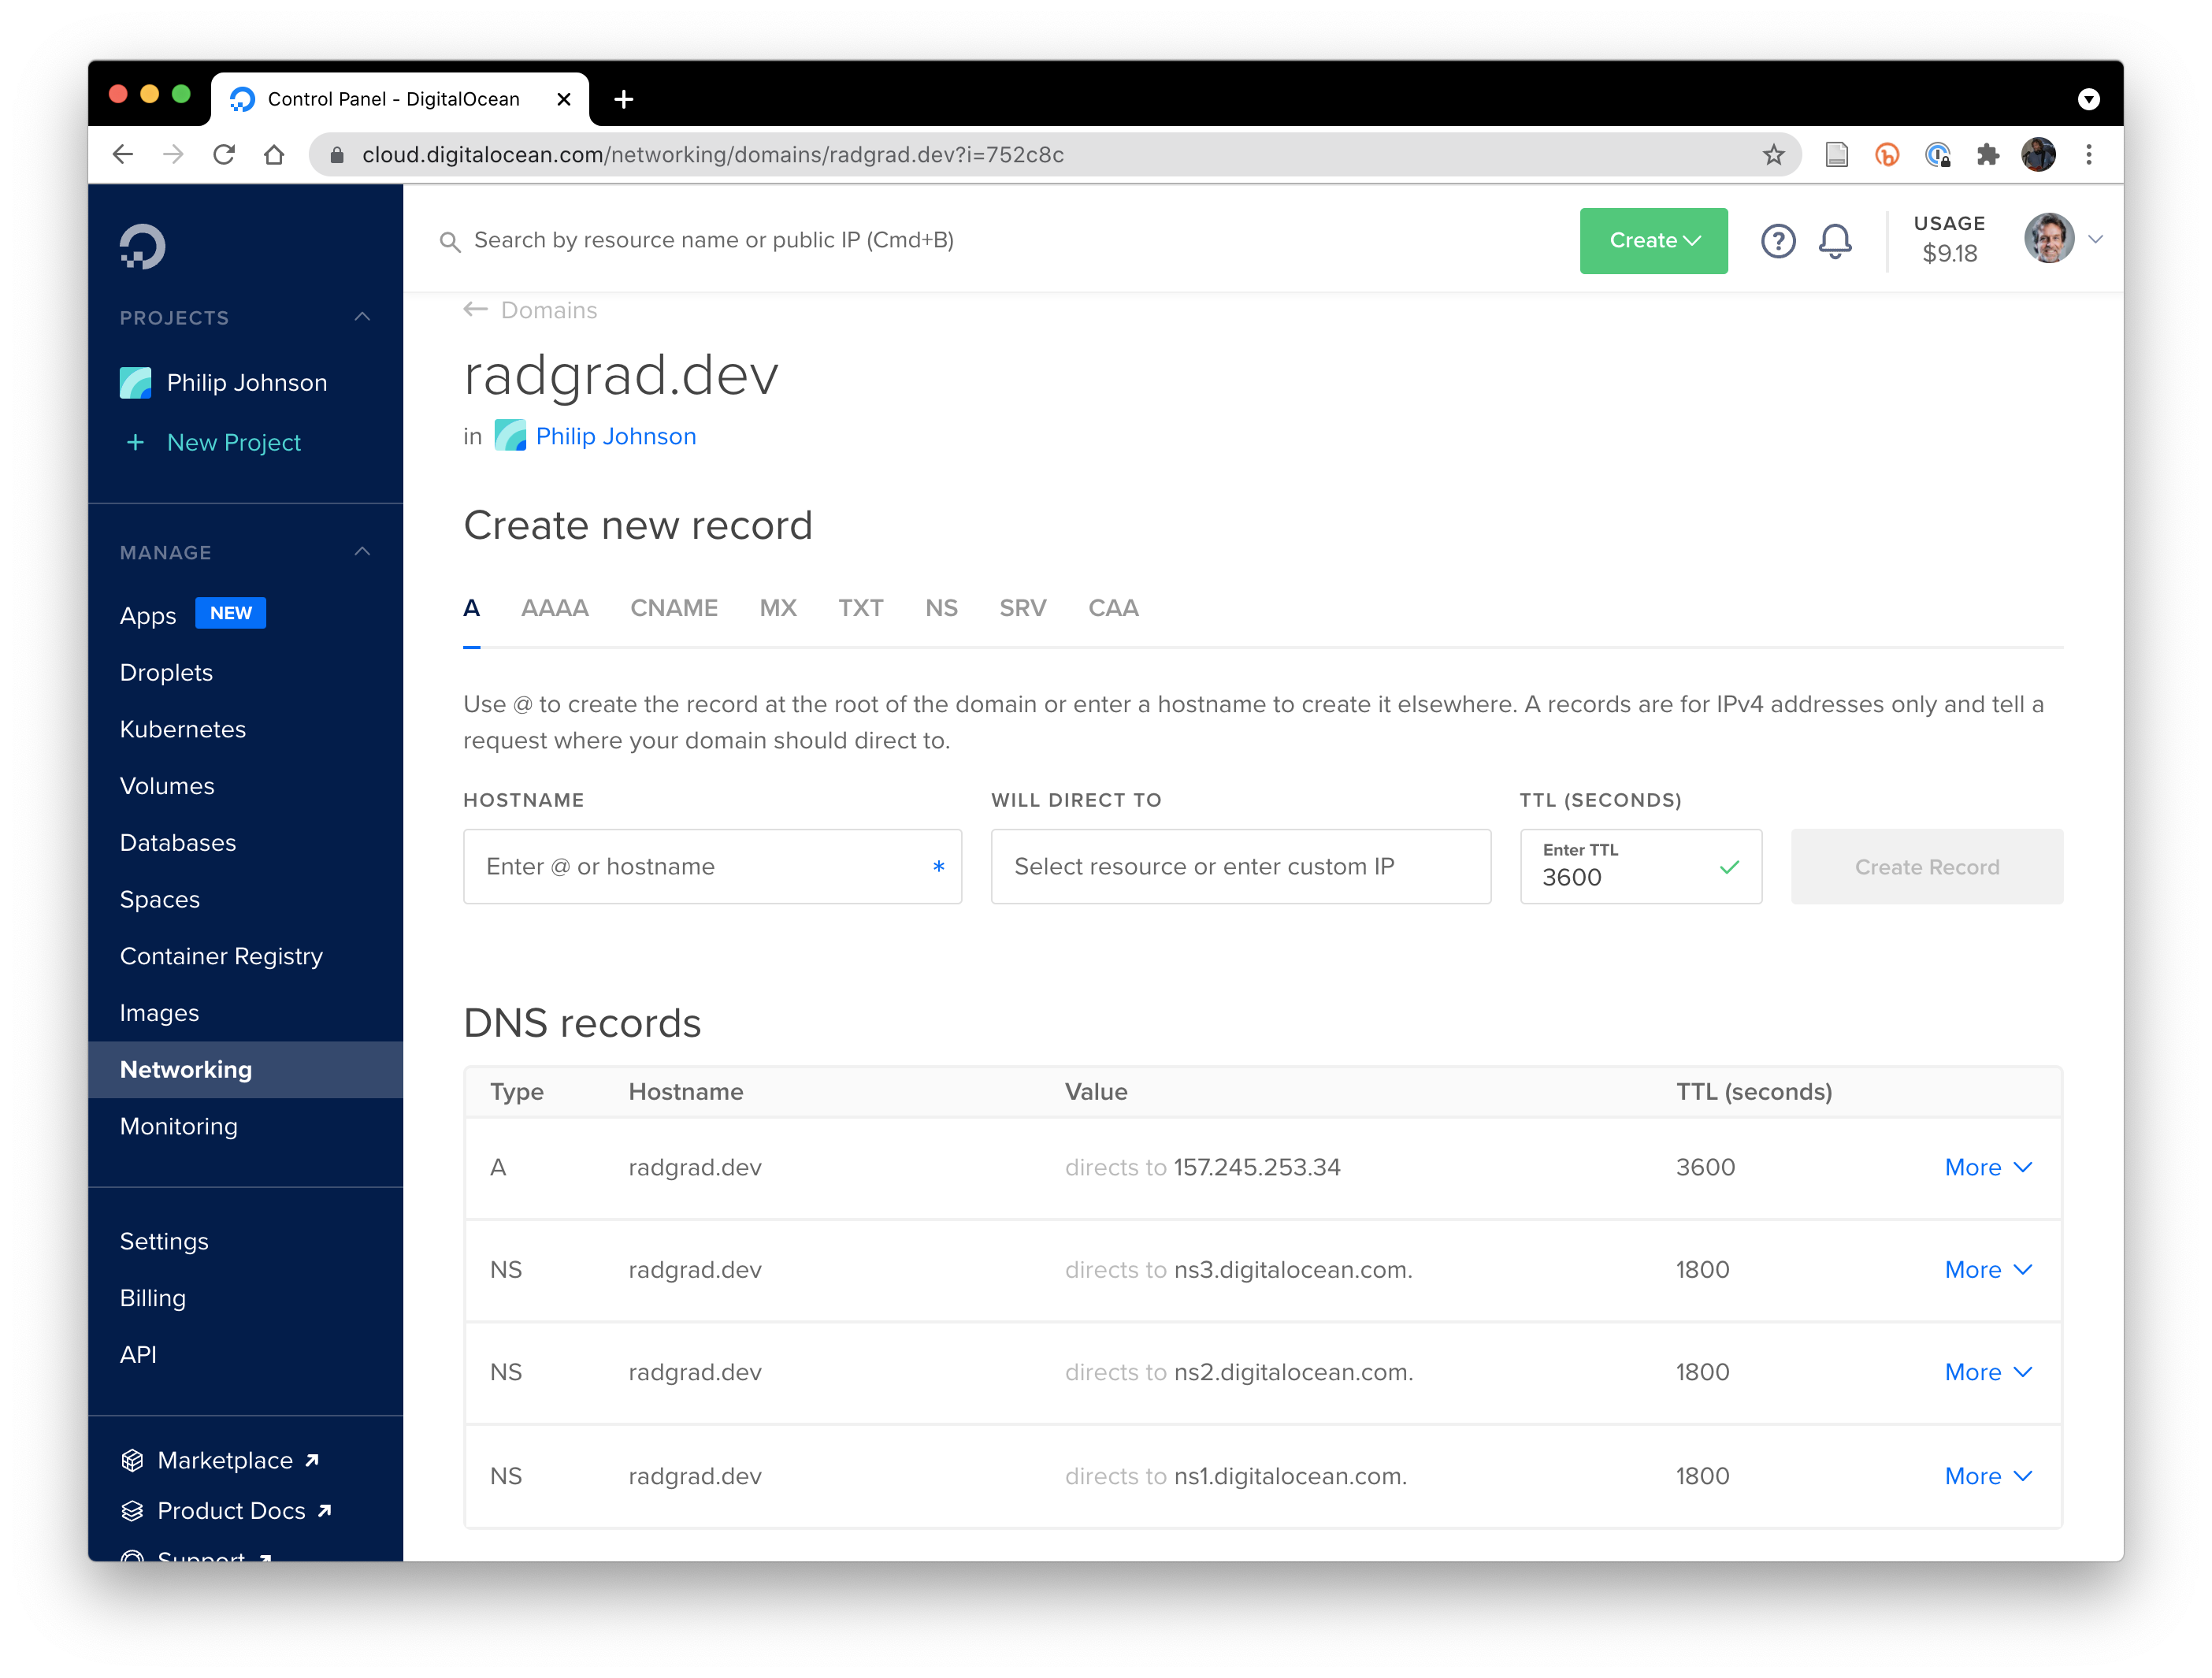
Once you've completed this, within a short time you should see that your domain routes to your droplet:
Configure app/.deploy/mup.js
Copy app/.deploy/sample.mup.js file to mup.js. It will look something like this:
Note that there are several occurences of the string “CHANGEME”. This indicates the parts of the mup.js file that need to be configured for your application. You can edit these strings to be lower case, they are upper case only to make them stand out in the file.
Note: that the “host” and "domains" values are just the domain name. For example, if your domain name is "radgrad.dev", then the value of "host" and "domains" should be just "radgrad.dev". Do not include "https://" in these fields.
However, the ROOT_URL includes the protocol. For example, if your domain name is "radgrad.dev", then the value of ROOT_URL should be “https://radgrad.dev”.
Configure app/.deploy/settings.js
Copy app/.deploy/sample.settings.js to settings.js. Edit this file to include appropriate credentials and other information specific to your deployment.
Run mup setup
Inside the app/.deploy directory, invoke “mup setup” (or “mup.cmd setup” on Windows). You should get output like the following:
For more details on the setup command, see http://meteor-up.com/docs.html#setting-up-a-server.
Run mup deploy
Now you can bundle up your Meteor application, send it over to the Droplet, and start it running on your Droplet.
Inside the app/.deploy directory, invoke “mup deploy” (or, on Windows “mup.cmd deploy”). You should get output like the following:
For more details on the deploy command, see http://meteor-up.com/docs.html#deploying-an-app.
After deployment finishes, the app should be live.
Check status of deployment through logs
To ensure that what you wanted to have happen actually happened, check the logs with mup logs:
Sample invocation and results:
Find and save the admin password
Extremely Important Note: Each time you start up RadGrad and initialize it with a new database, a new admin password will be generated and the log file will be the only place it is made available. You must print the logs by running mup logs, find the line that indicates the admin password within the logs, and save that password someplace safe.
Note that the logs are cleared each time you deploy an update, so it is important to find and save that admin password.
If you forget to save the admin password, you will need to clear the database and reinitialize the system from scratch in order to regenerate it. There is no way to recover it after it is deleted from the logs.
Finish initial setup
See the next sections for additional setup instructions, including:
Publishing a new release
Once you have successfully set up your RadGrad server, subsequent updates to the system are much more simple.
See Publishing a new release for details.