Microsoft Azure
Deployment Documentation
To best document how to deploy a Meteor application to Microsoft Azure, we provide the meteor-example-deploy-azure github repository. This repository is a copy of meteor-application-template-react, modified with one additional file (config/settings.production.sample.json) to support deployment to Azure. It will also install the meteor-azure library.
Install meteor-example-deploy-azure
First, make sure that you can install and run meteor-example-deploy-azure on your local computer. Clone the repository, and follow the instructions in the README to install third party libraries (meteor npm install) and run the system (meteor npm run start).
You should be able to see your application running at http://localhost:3000 when this step is completed.
Create a Microsoft Azure account
First, create a free Microsoft Azure account.
Sign up. Get the free trial/student trial. Go to the portal if you are not there already. Button should be in the top right corner. We will start a new App Service.
Create a new App Service
Go to the Side bar > App Services, then click Add.
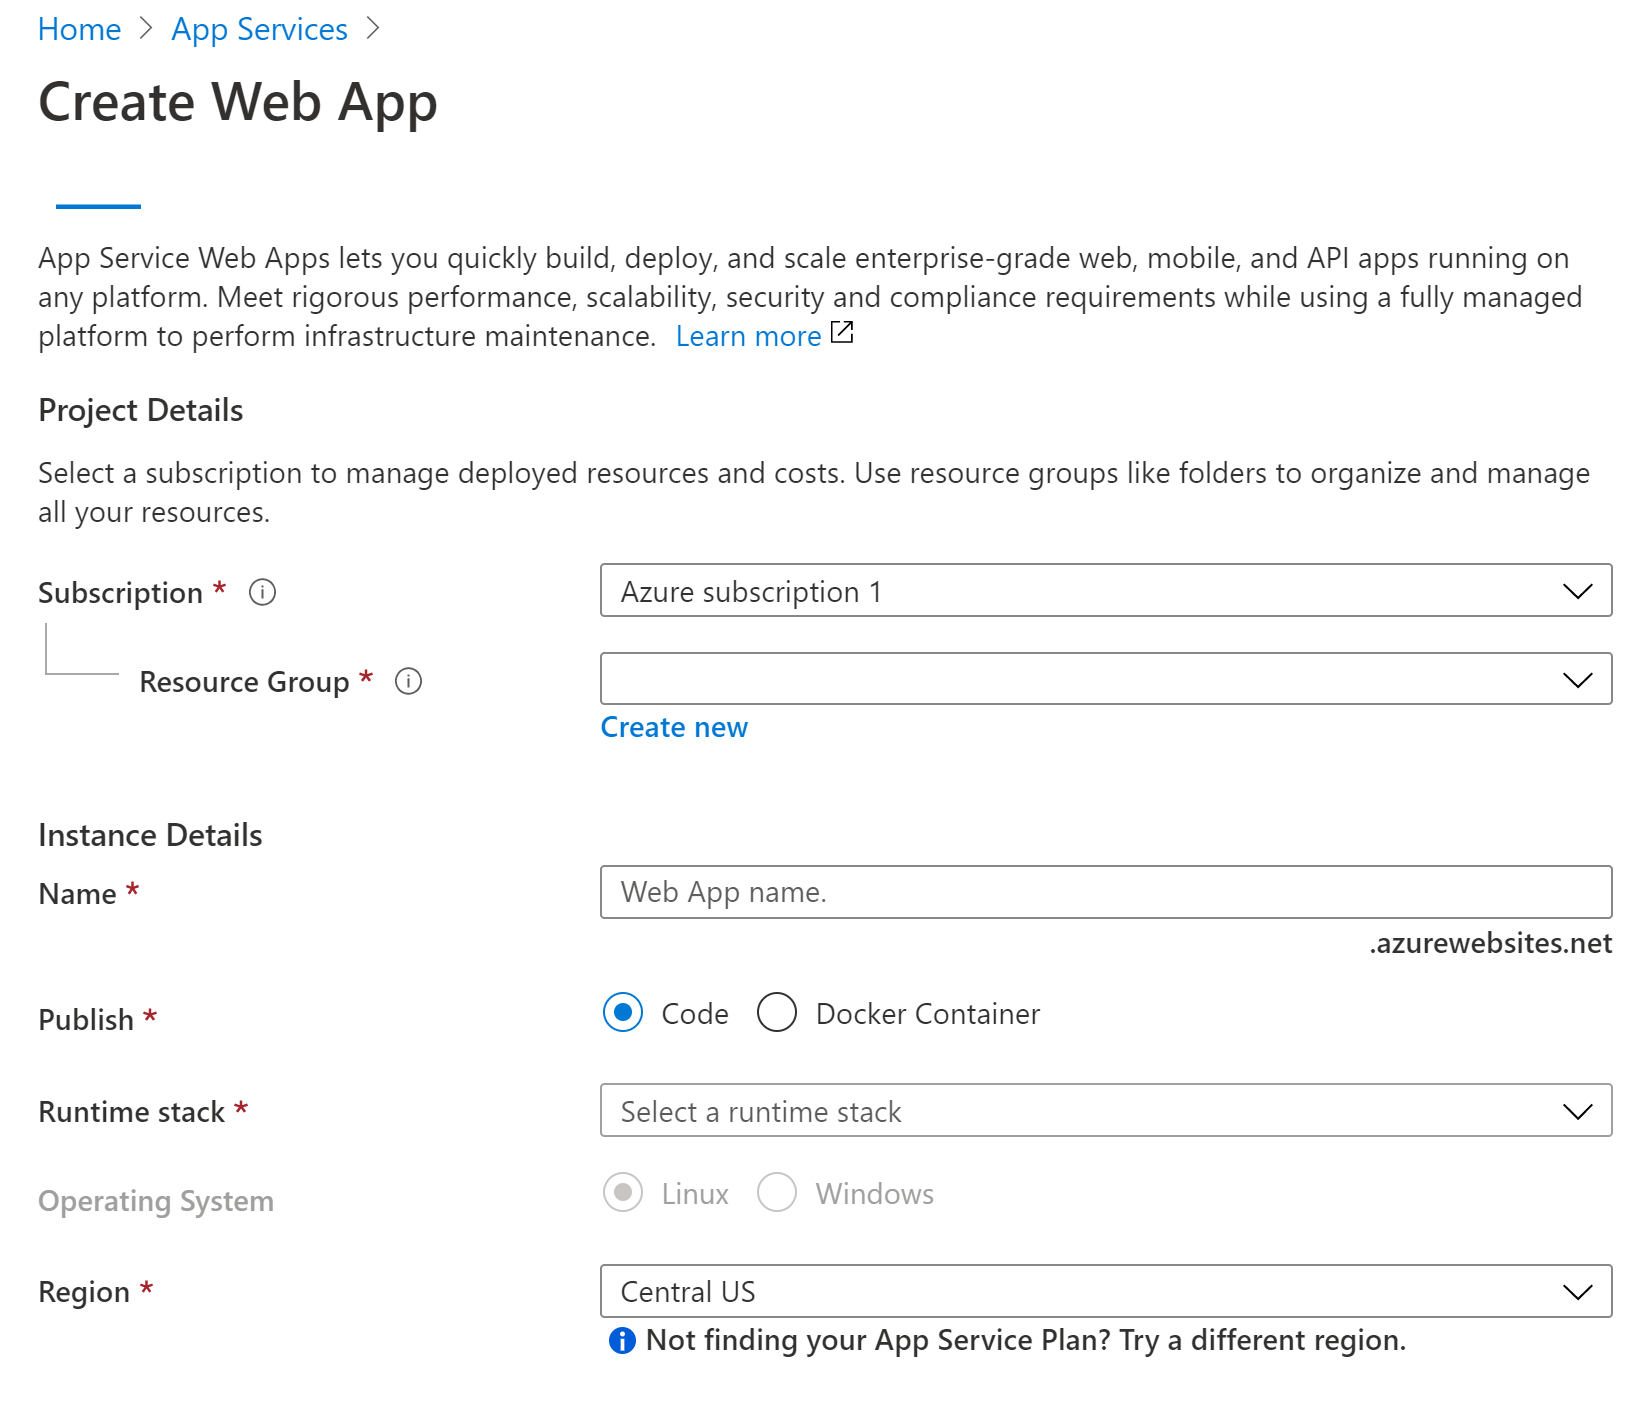
Here are some field settings:
Name: Provide a name.
Resource Group: You will want to create a new resource group. This will hold a group of resources together (e.g. a database, or app services) for easier management. Note that you can reuse this group in the future.
Publish: Code
Runtime Stack: Node 12 LTS
Region: West US
The App Service plan designates how much resources Azure makes available for you to use. This costs money. Change your cost by selecting "Create new" when selecting a plan, and then click "Change size" for your "Sku and size".
Sku and size: IMPORTANT. Select the one you need. Default will be a production plan with a going rate of \$75/month, but if you have the free trial it doesn't matter. There is a free developer version, but I have found it inadequate in terms of space for the meteor template. If you wish to select it, click "Change size > Dev/Test tab > Select "F1".
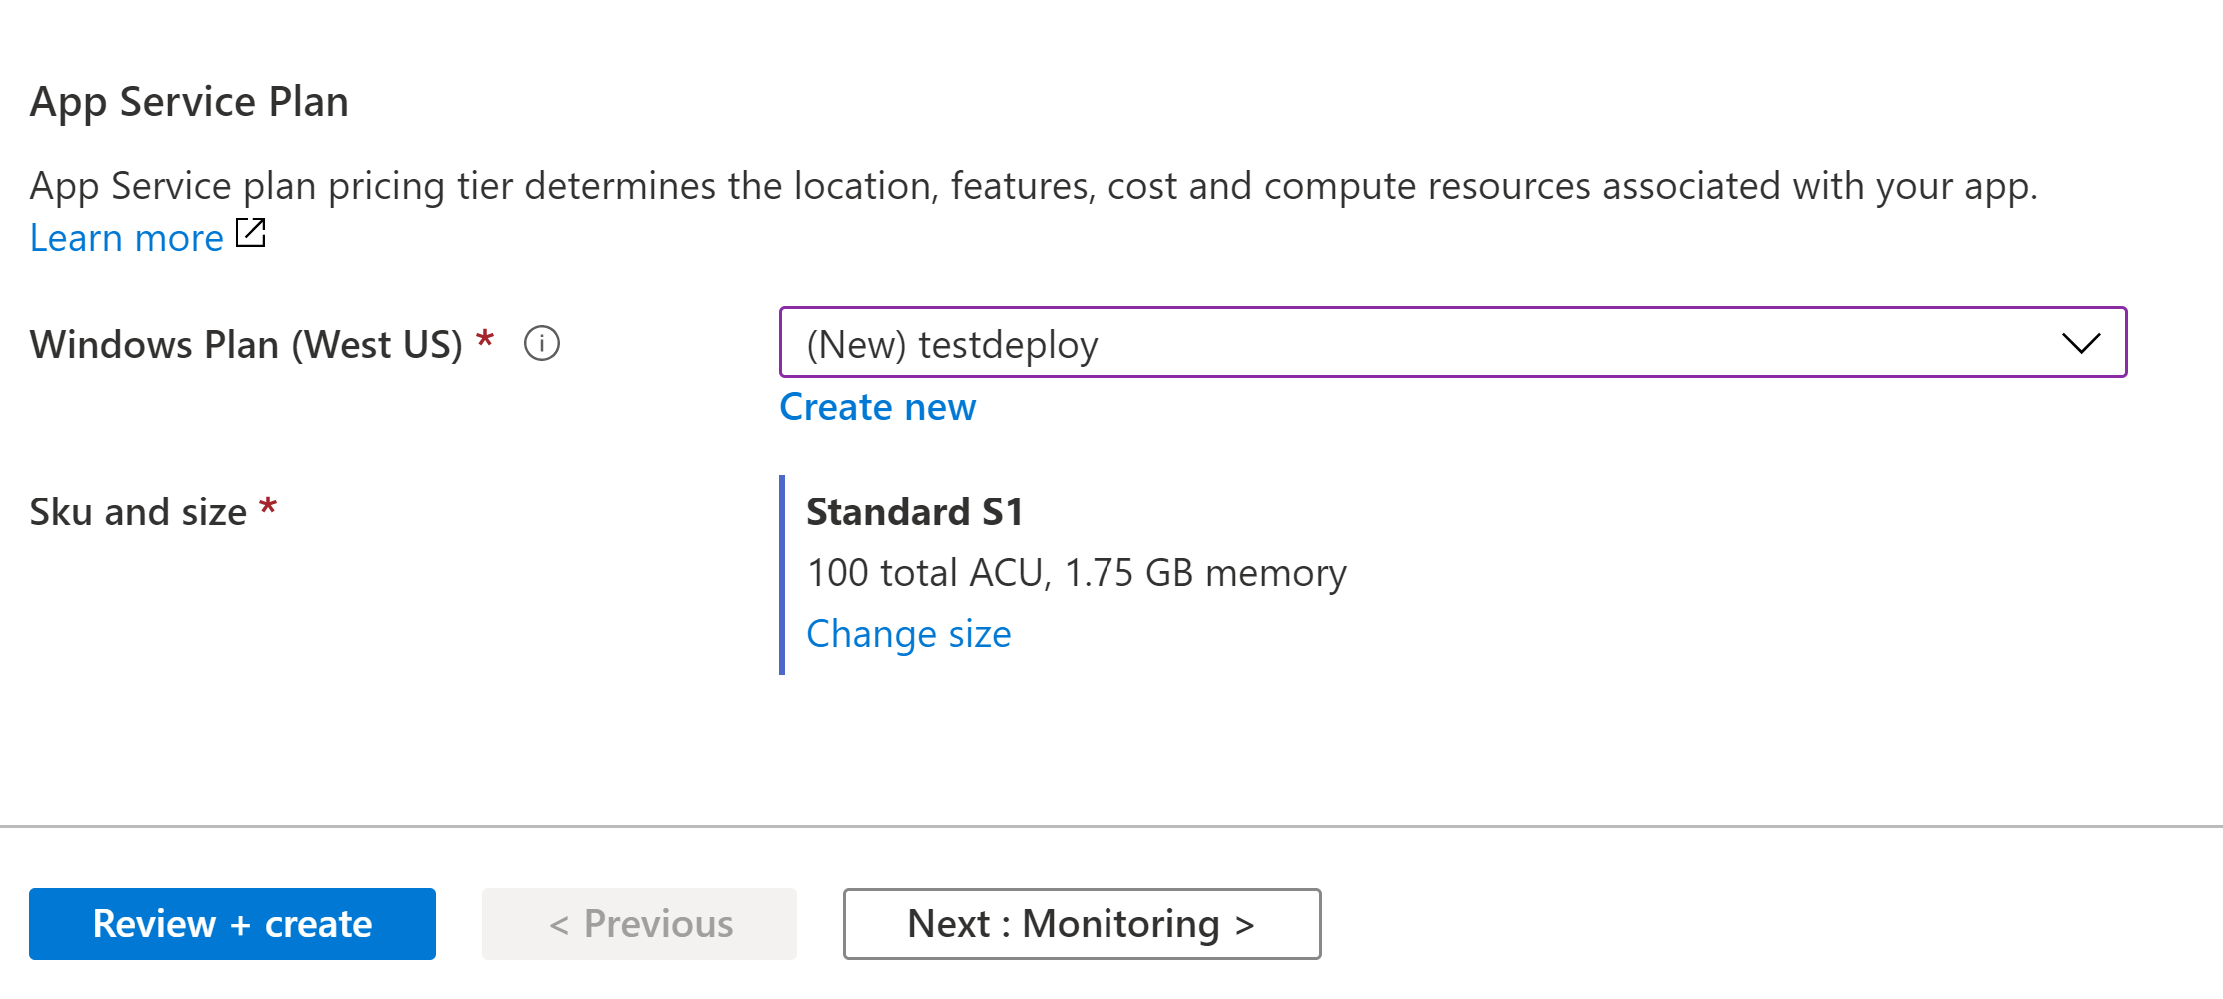
Click "Review + Create" at the bottom of the page Verify your info. Click "Create". You should be rerouted to a page that says "Deployment is underway", and eventually will complete.
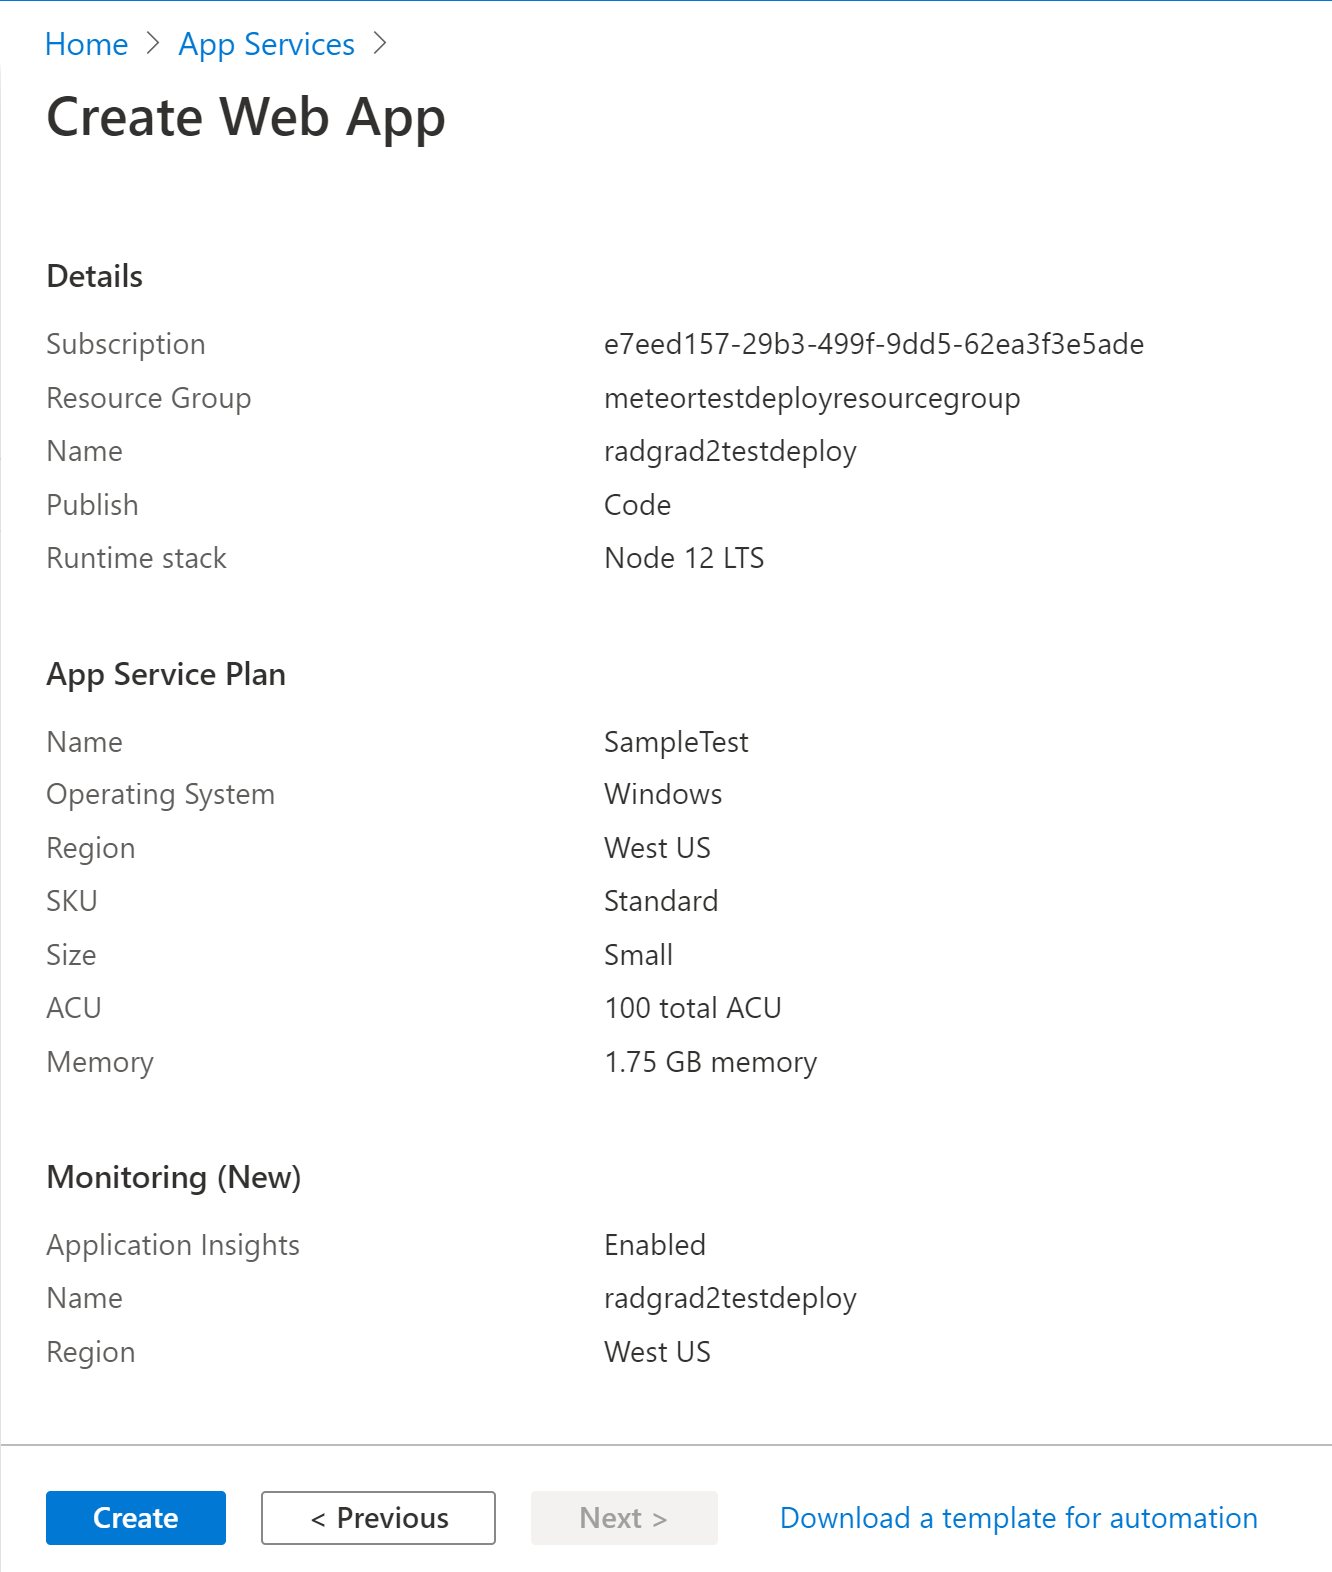
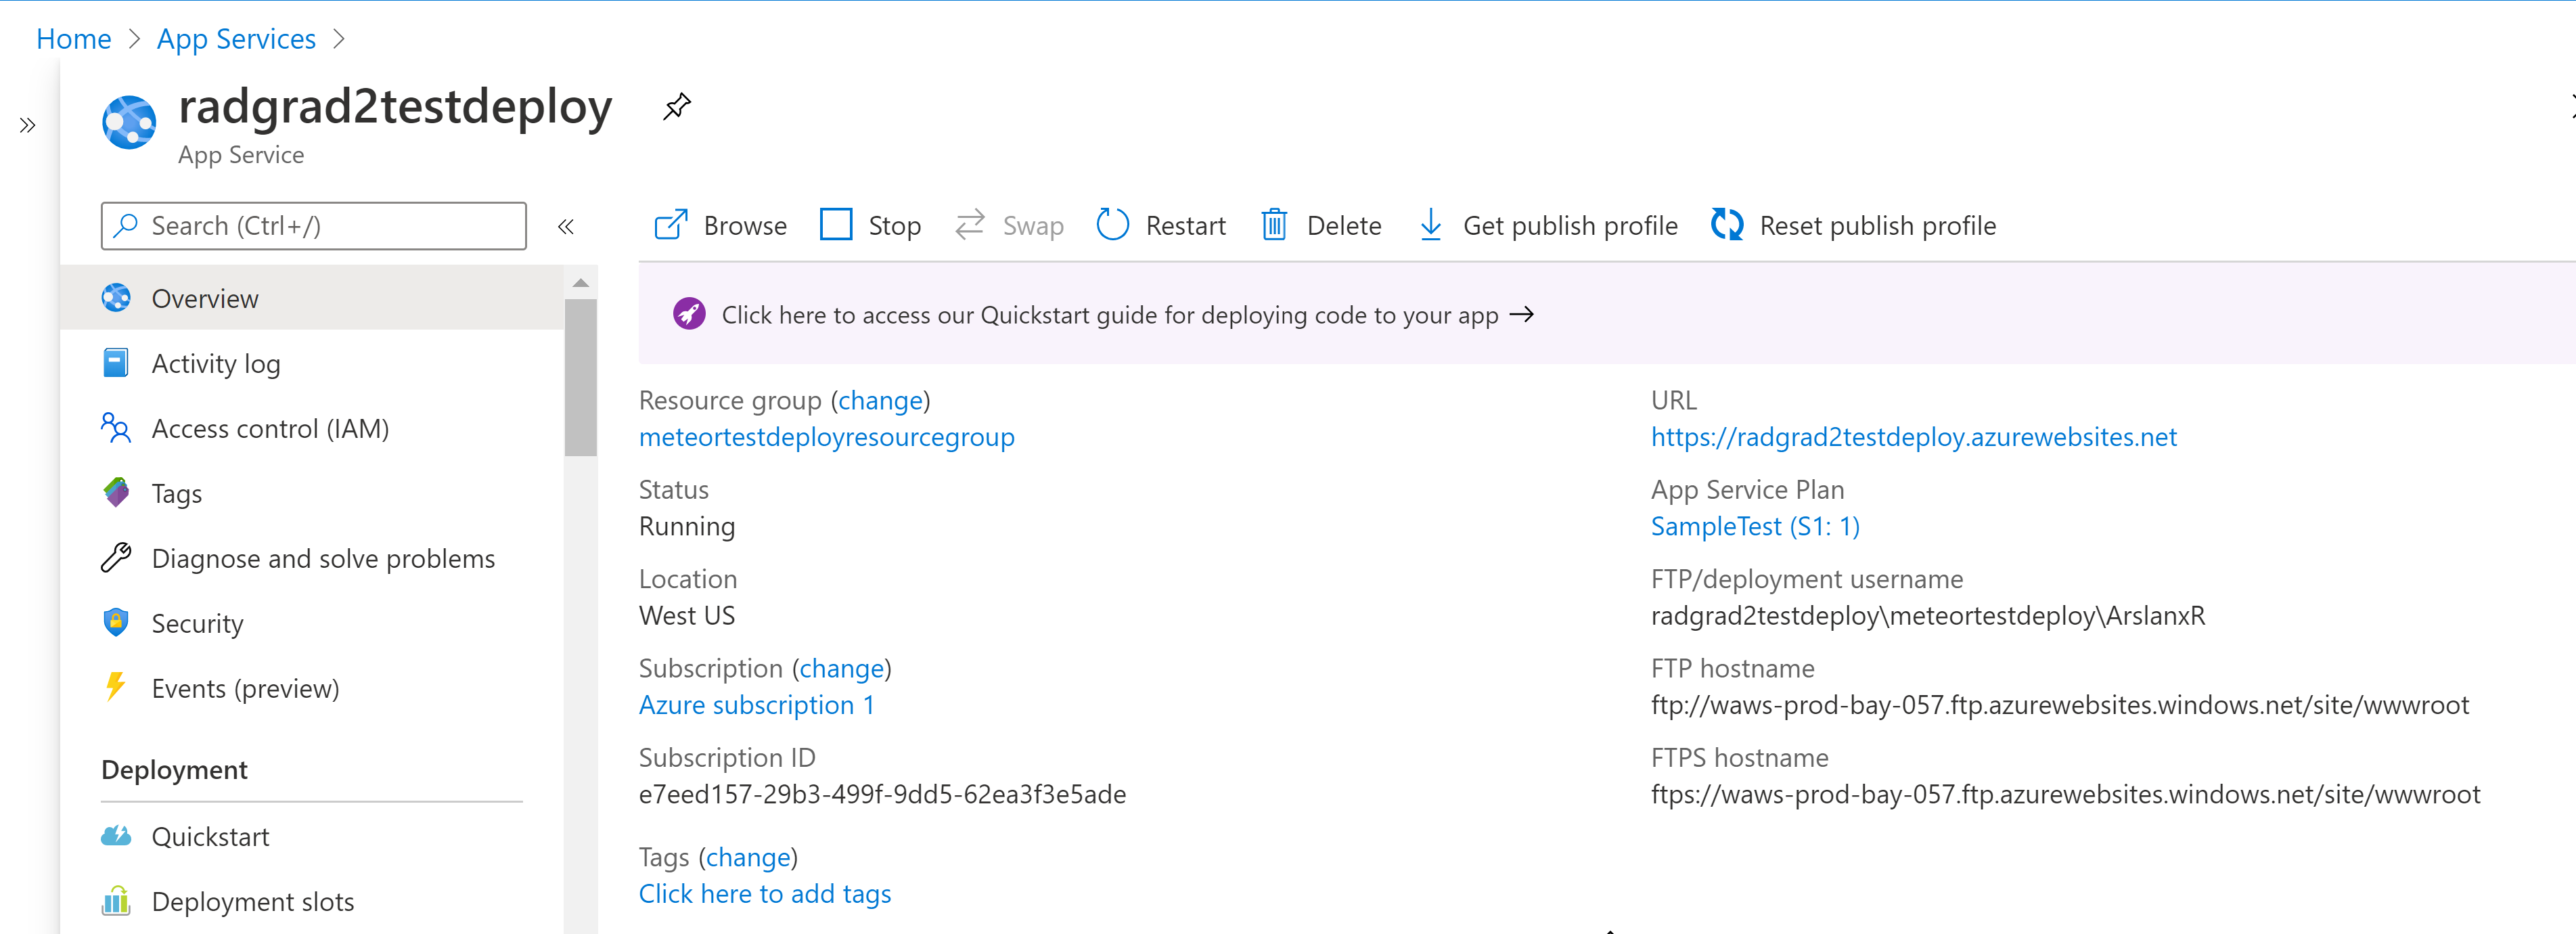
Go to Sidebar > Overview > Your URL will be in the right column in the form of yourappname.azurewebsites.net
Configure a MongoDB database
Azure Cosmo DB provides a version of MongoDB compatible with Meteor.
First, set up a Azure Cosmos DB account here.
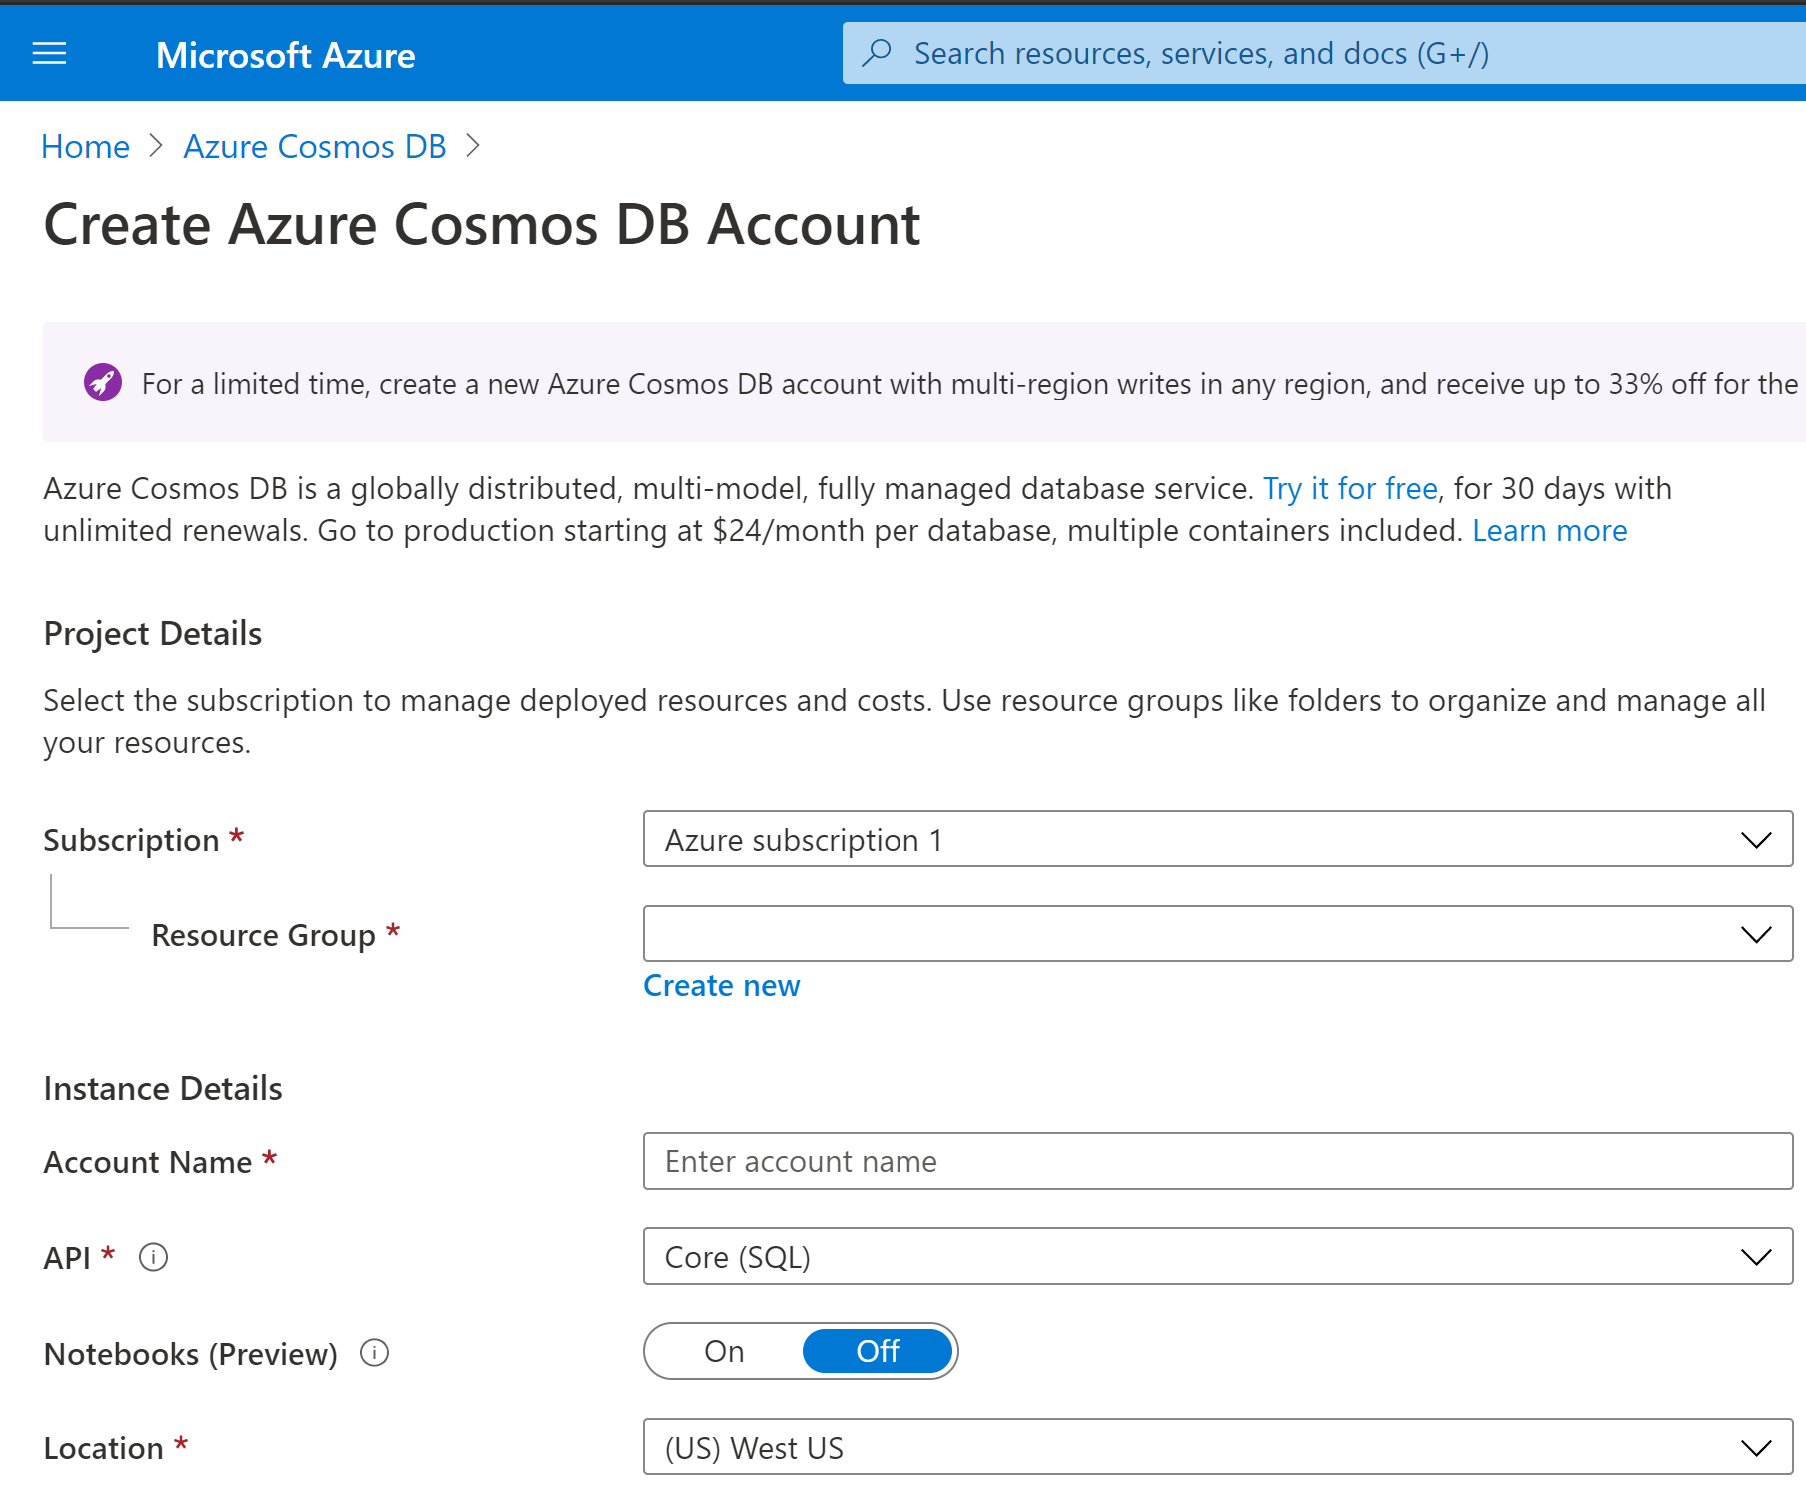
To set up Cosmos DB:
Click "+ Add" button
Select your subscription and resource group
- Select the resource group you used to create your app
Create an account name
Select the API.
- From the drop down menu, select Azure CosmoDB for MongoDP API
Notebooks(Preview): Off
Location: US West
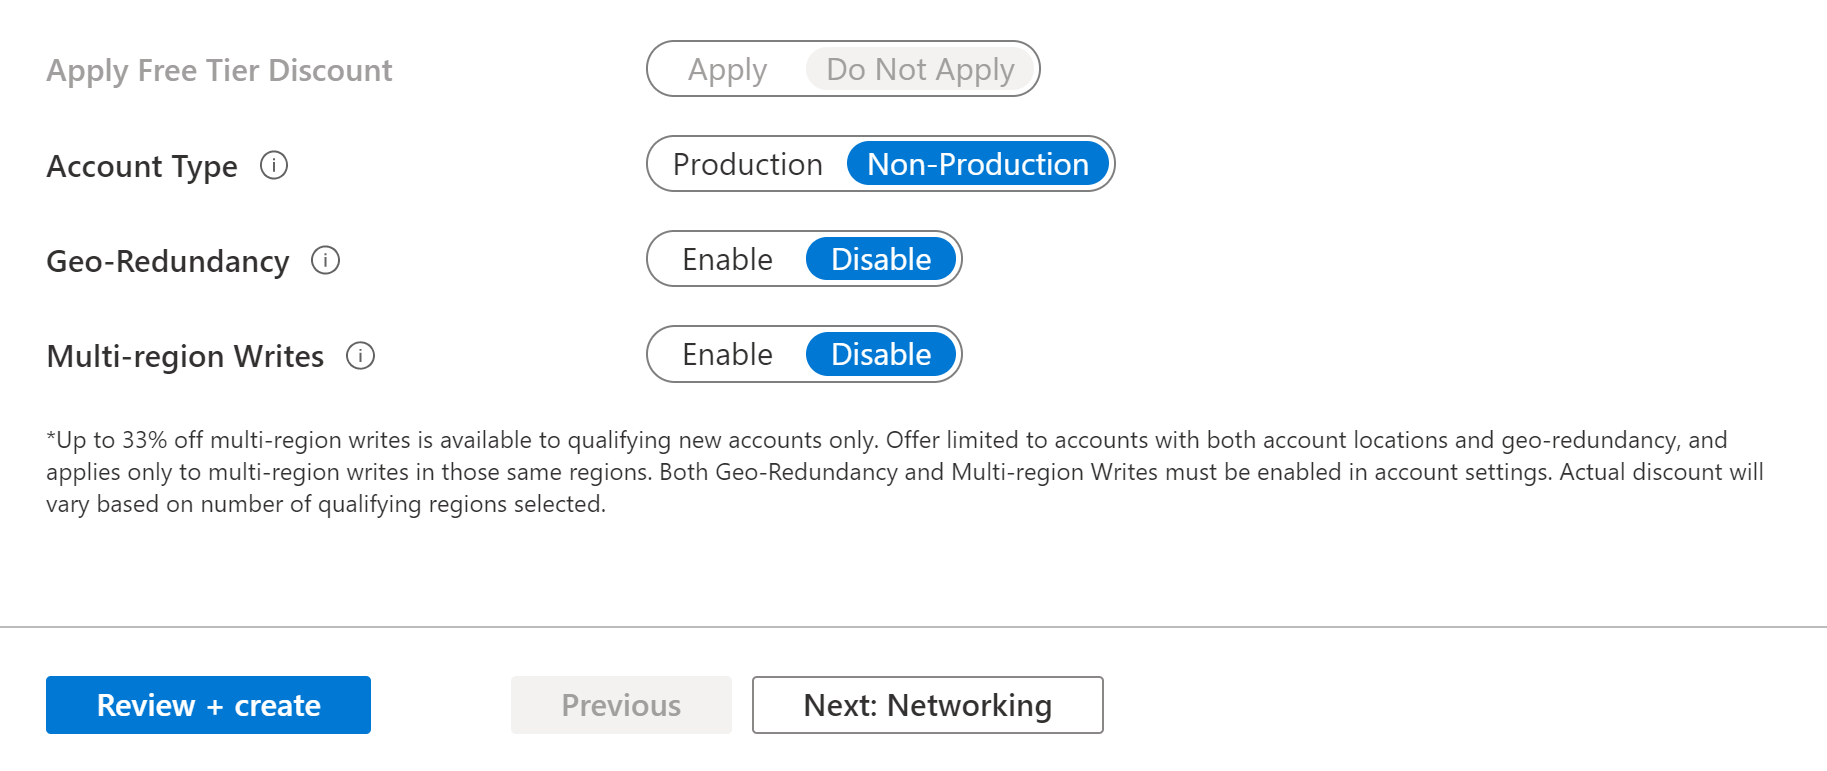
Apply Free Tier Discount: Apply if you are eligible for it. Should be eligible if it is your first time making an account
Account type: Non-Production.
Version: 3.6
Geo-Redundancy: Disable
Multi-region Writes: Disable
Click "Review and Create" Review your information and create. Azure will take ~10 minutes to deploy.

Configure the application
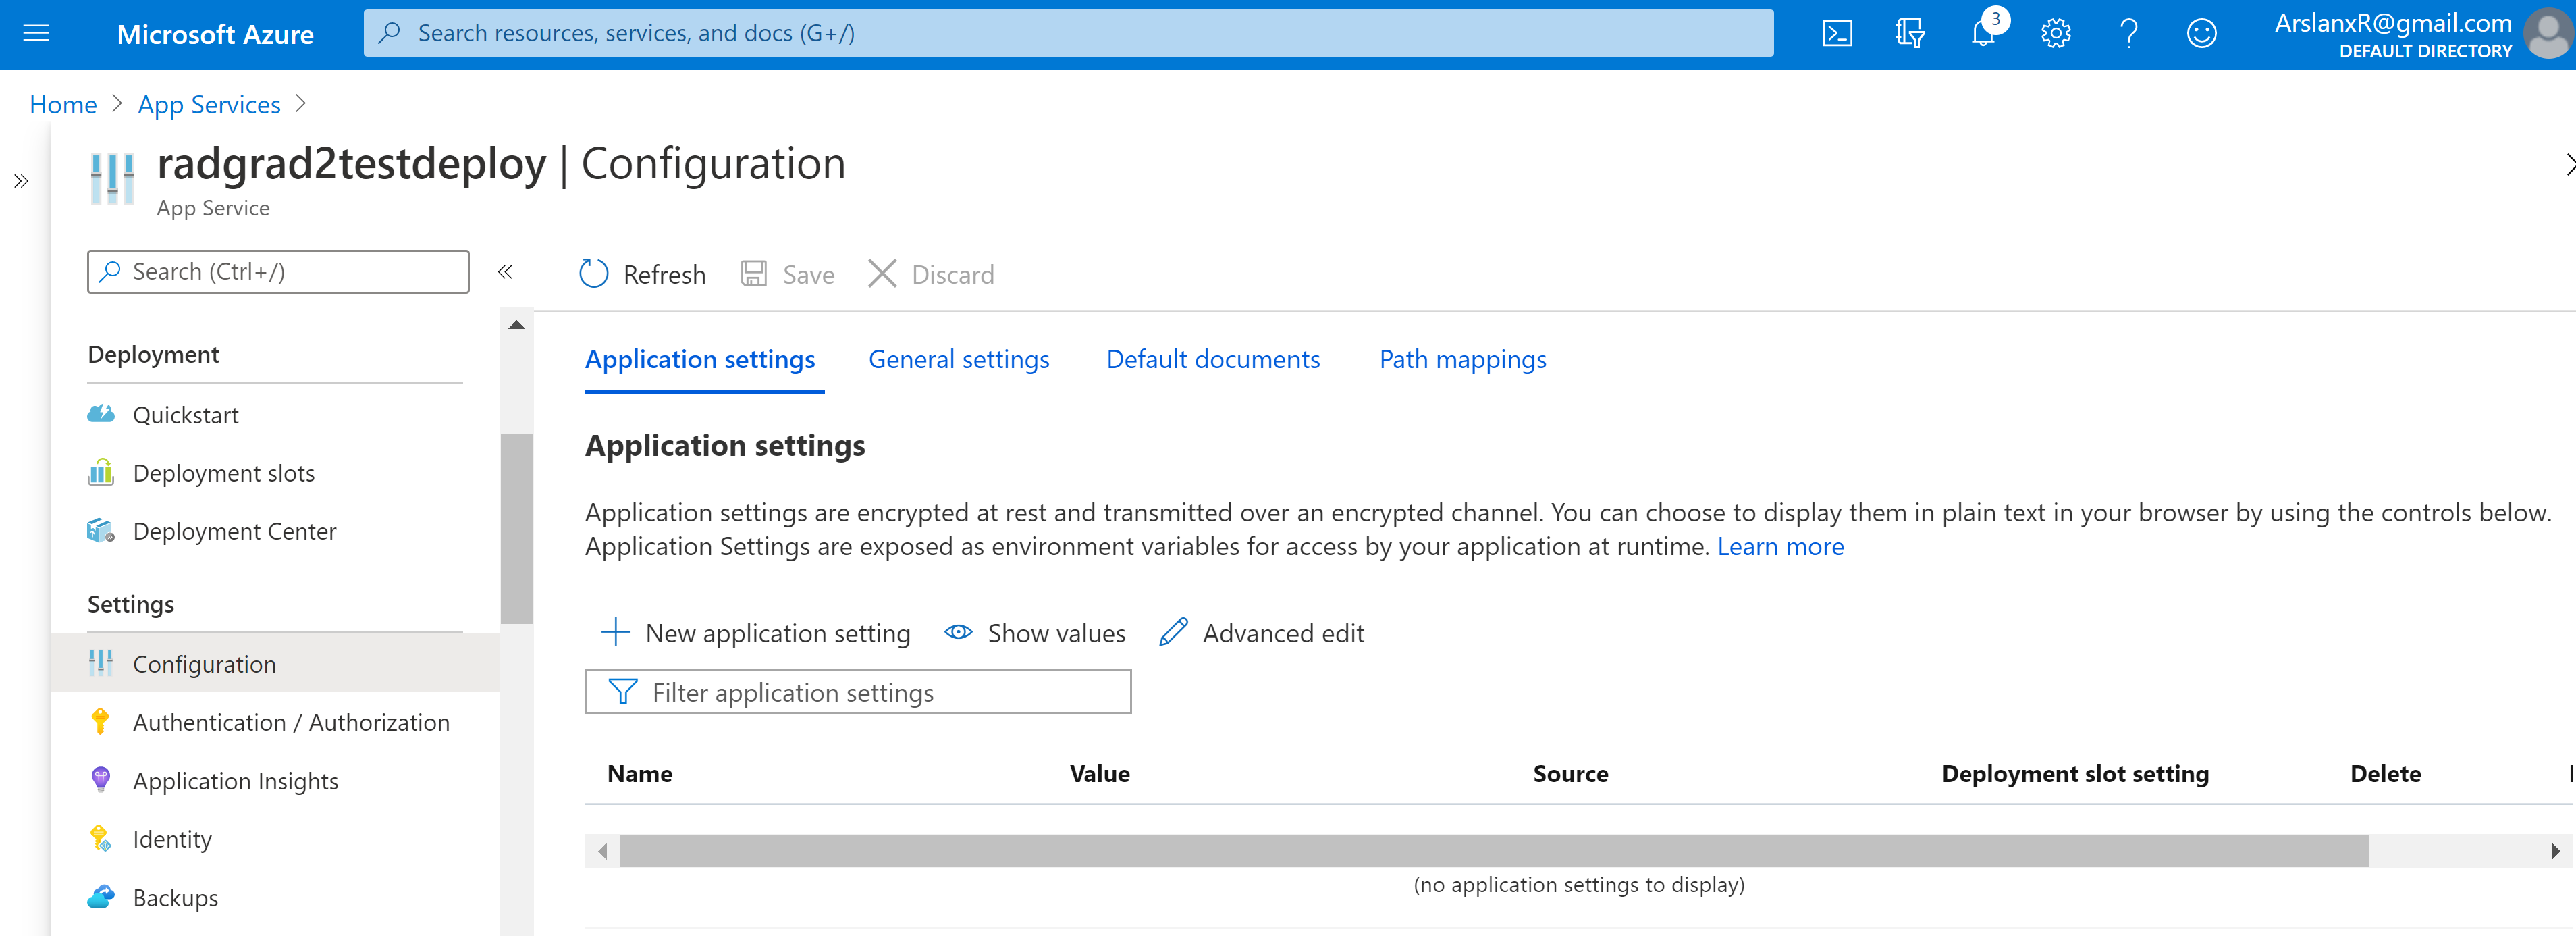
Here, we will get out App ready for deployment on the Azure portal. Through App Service, navigate to:
- Sidebar > Configuration > Application Settings (should take you here by default).
Clear off any existing entries in the application settings. This can easily be done by selecting "Advanced edit" and clearing everything between these [ ] top level brackets.
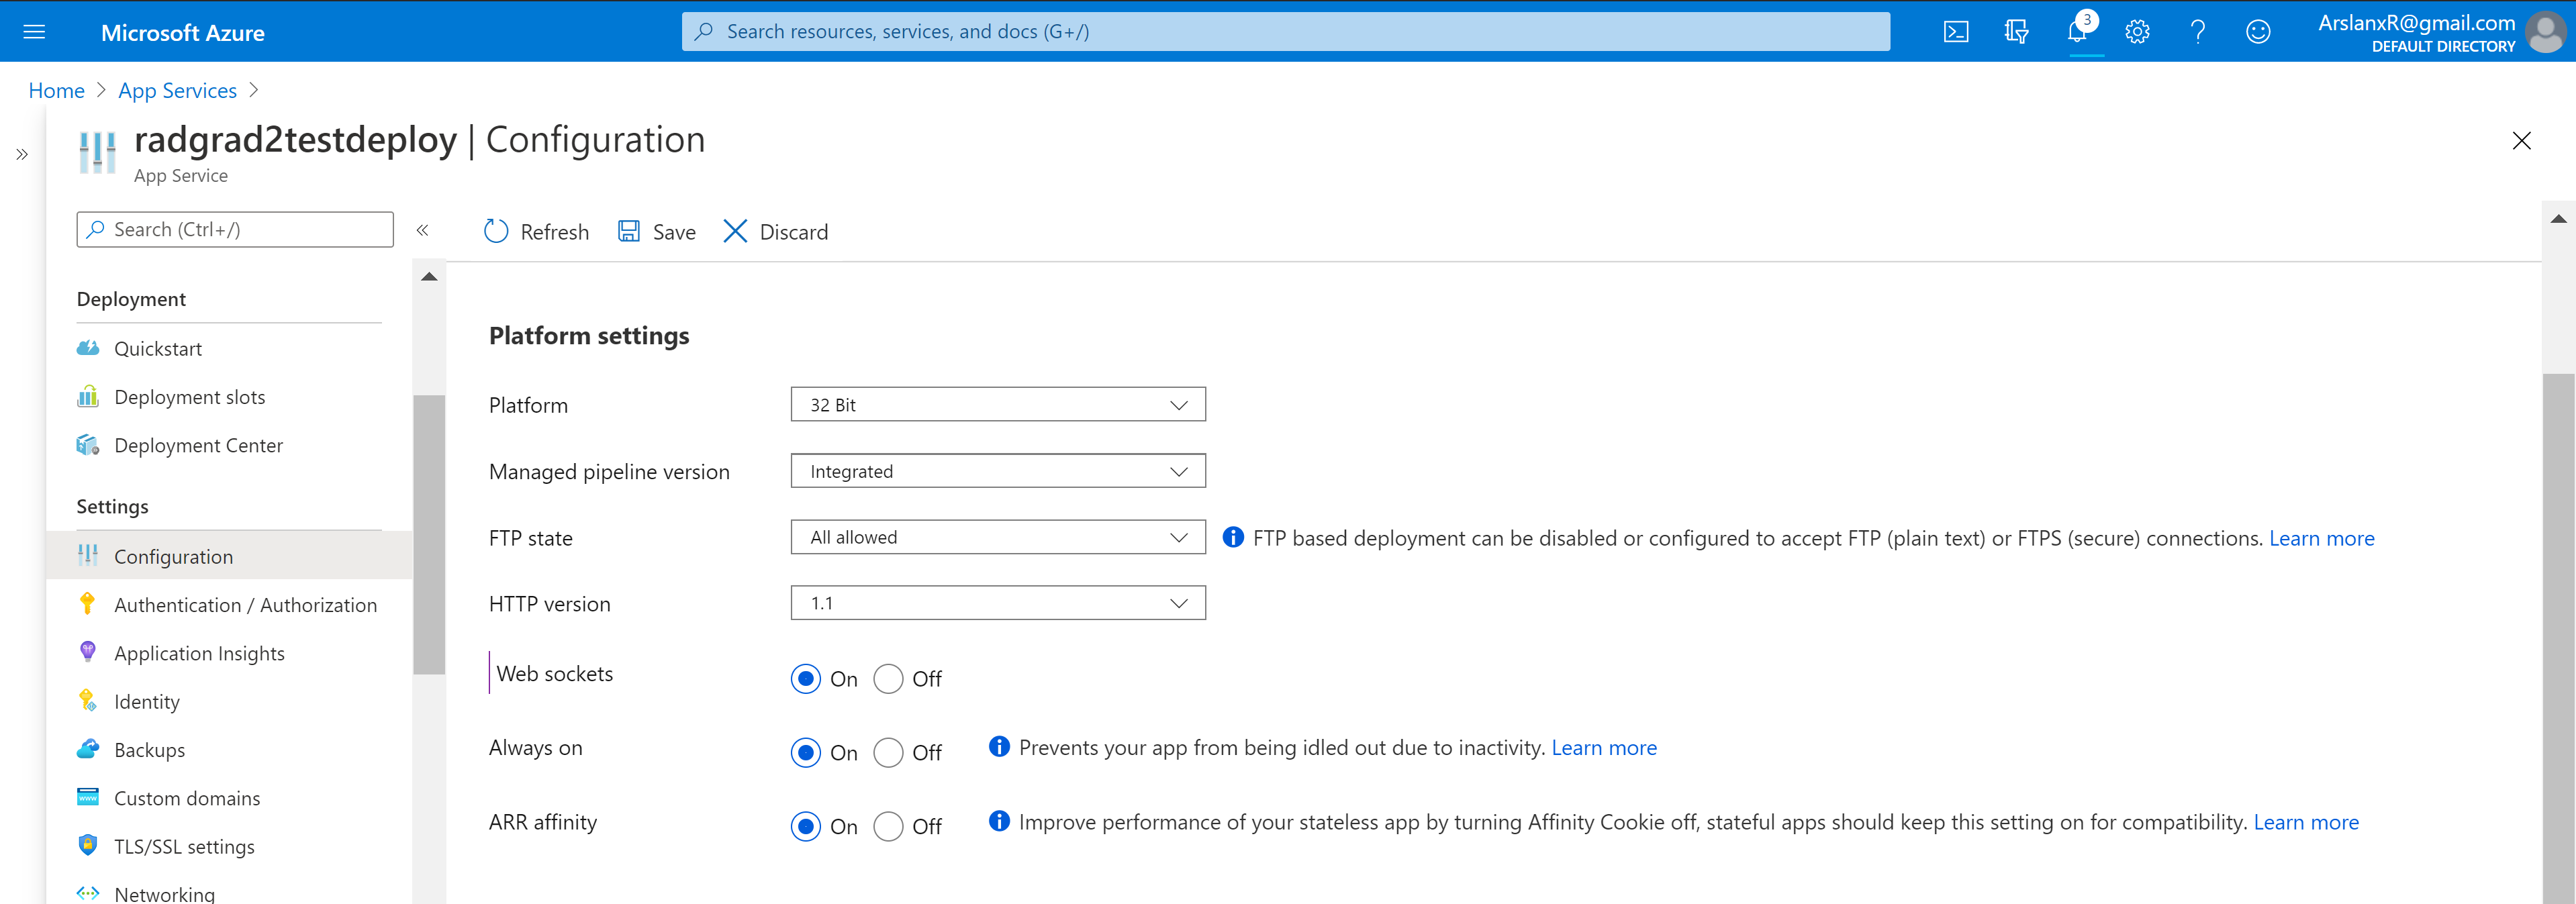
Click on the General Settings tab. Ensure “Web sockets” and “ARR affinity” are enabled.
Next, go to:
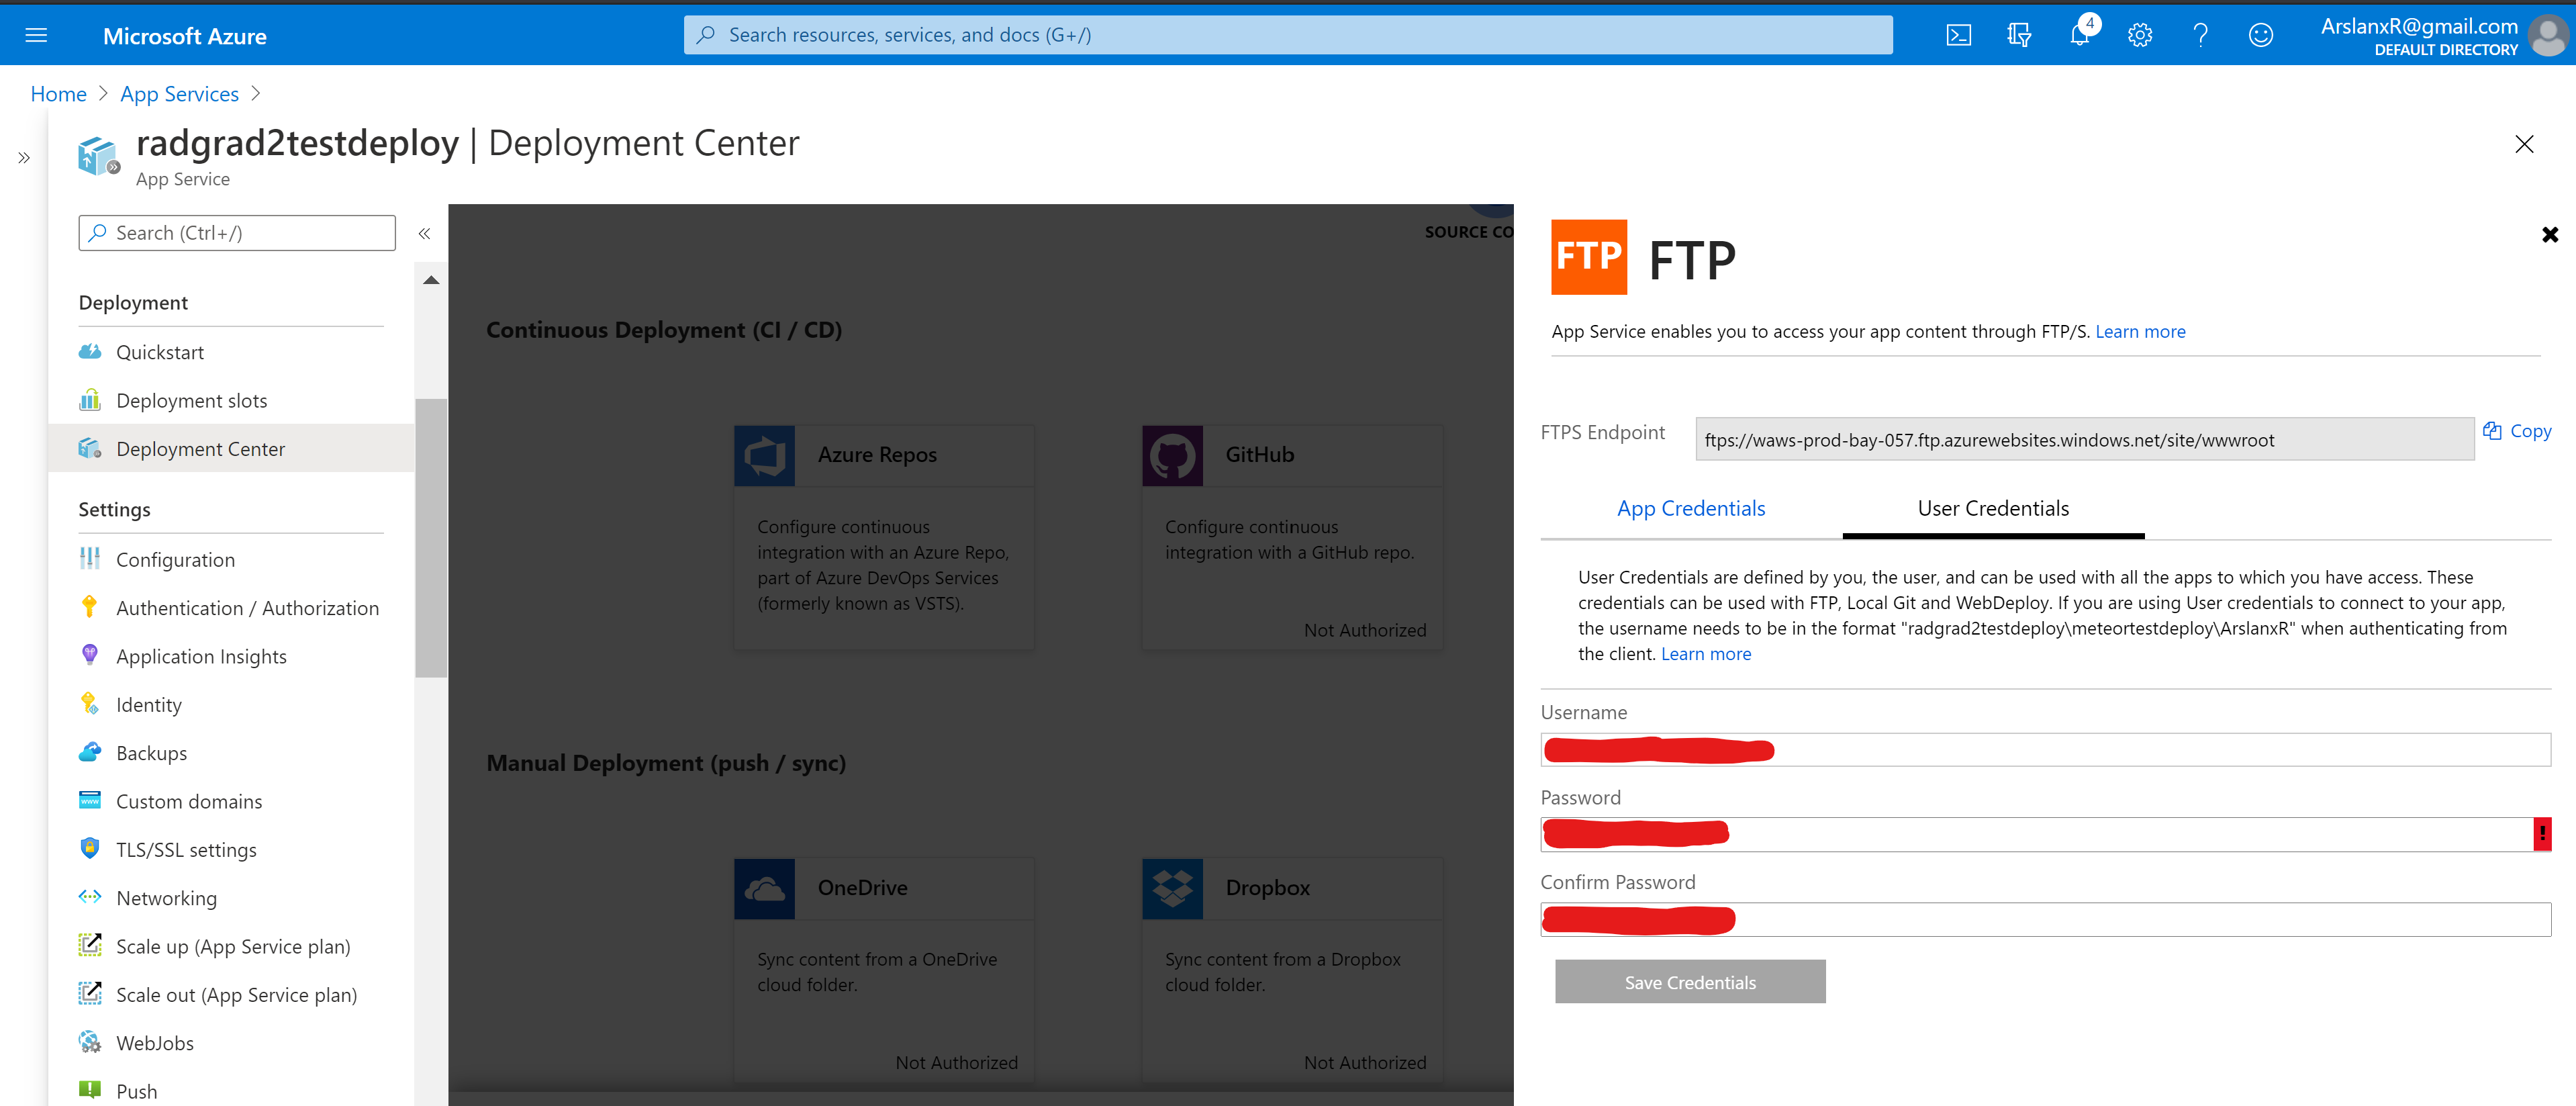
Sidebar > Deployment Center > FTP and click the "Dashboard" button at the bottom > User Credentials
- Make a username in the form of yourappname\yourusername, along with a password (there are some password characters that are not accepted.)
Configure settings.production.json
The config directory contains a file called settings.production.sample.json, which is a template you can use to create the settings.production.json file. The template looks like this:
Copy the contents of settings.production.sample.json over settings.development.json. Rename settings.development.json to settings.production.json. Then edit the fields as follows:
Sidebar > Overview. Record your app name, resource group and subscription ID
You can find your TenantID by searching for "Tenant properties" in the search bar at the top of the page
Enter your FTP user credentials.
Edit your ROOT_URL with your app name.
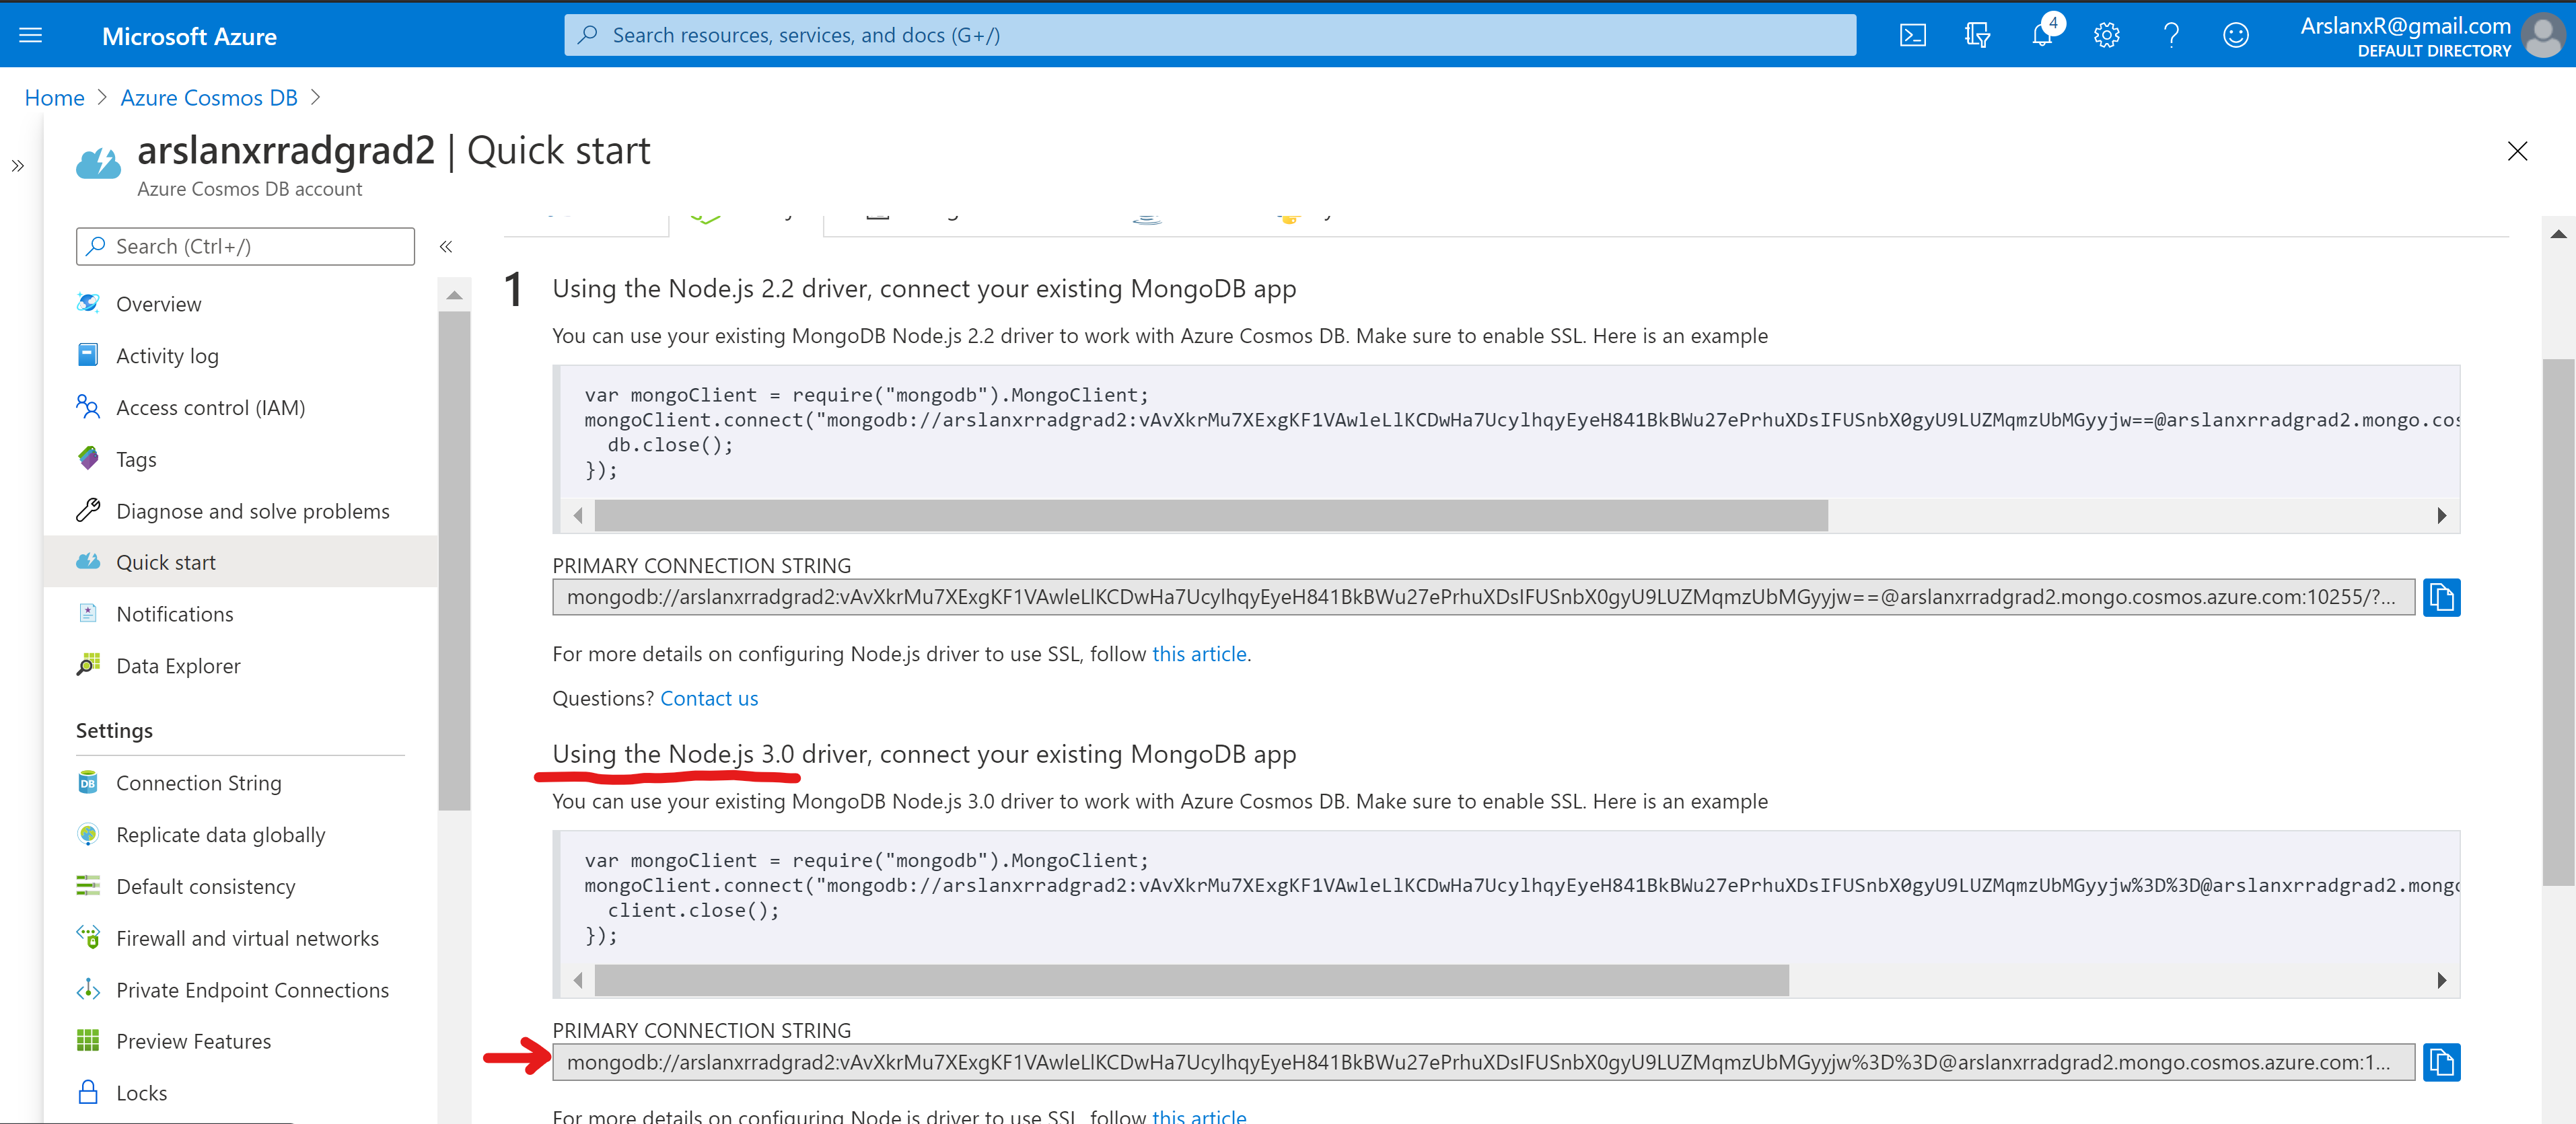
MONGO_URL:
- Click the Microsoft Azure button next to the hamburger in the top left to go to the Homepage
- Select your Azure Cosmo DB account
- Sidebar > Quickstart > Select Node.js tab
- Scroll down to "Using the Node.js 3.0 driver, connect your existing MongoDB app"
- Our MONGO_URL is the PRIMARY CONNECTION STRING.
Deploy the meteor app to Azure
Navigate to the project directory on your local machine and run:
Your project should now be live at https://yourappname.azurewebsites.net
Troubleshooting
Debug mode
If you are having trouble, debug mode might be insightful. Turn it on with.
error: Could not read settings file at 'your file here'
In the package.json there is a script "deploy": "meteor-azure --settings config/settings.production.json --architecture 64" That deploys your application to Azure
Changing the --settings config/settings.production.json to include the full path instead of the relative one might solve this problem. For example, the following may work.
--settings C:\path\to\meteor-example-deploy-azure\config\settings.production.sample.json
Kudu
It is easy to troubleshoot with kudu. You can access the app's server anytime by adding ".scm" into the url.